During late August and September, we finally managed to insulate and waterproof our roof. We worked with our roofing contractor, Ed Sullivan, to complete the job. He reckoned that it was probably one of the most awkward roofs he’s worked on! Due to the roof’s myriad planes and slopes, both insulating and waterproofing were time consuming, difficult tasks.
Our roofing system is a warm deck (i.e. the insulation is above the OSB deck) and this brings it inside the building’s insulation envelope. This should eliminate condensation as there should not be any cold surface on which condensation could form. It also eliminates the problem of thermal bridging which would occur on a cold deck, as the insulation would be between the joists (see video for comparison between warm and cold decks).
The roofing system we used was Resitrix Full Bond, an EPDM covering which was supplied by Laydex. This layer was bonded to the polyisocyanurate rigid foam insulation (PIR) which was mechanically fixed to the deck. PIR is normally used for living roof structures as it provides much greater thermal efficiency than wool-based insulation, and its rigidity allows the EPDM layer to be bonded to it fully. We were unable to find a suitable ‘natural’ alternative to PIR and had to observe the specifications of the roofing system we opted for.
For our roof, we were required to achieve a U-value of 0.16 W/m²K – to do this we needed a minimum of 150mm insulation. We decided to install 160mm, as retro-fitting insulation to the roof would be almost impossible and the extra depth will help to achieve our overall A3 rating.

Insulating the Roof:
Working with Ed Sullivan and his crew, we decided that we would insulate and cover the flatter, more gently sloping parts of the roof first. Then Maria and I would insulate the reciprocal roofs before Ed and his crew returned to complete the bonding of the EPDM covering.
We purchased enough insulation for two layers of 80mm (160mm of insulation) to cover the whole roof. As the insulation is rigid, we needed two layers of 80mm sheets as we were able to ‘bend’ them into the contours of the roof. This would not be possible with 160mm sheets. This did entail a lot of repetitive work as each layer was quite similar but we had to ensure that we bridged the joints in the insulation, where possible, to make the insulation effective. The insulation was affixed to the deck with metal fasteners and was then coated with a primer which was fully bonded to the EPDM cover.


Once the flatter lean-to roof was insulated and covered we began to work on the reciprocal roof. This was towards the end of July and luckily the weather remained mainly dry. It took about two weeks to complete the insulation of the reciprocal roofs as there was a lot of cutting, fixing and offering-up. The day after we finished insulating the roof the summer rains began falling!


When the insulation was completed, we had a delay due to weather and contractor commitments. However, by mid-September the weather had improved and we were able to complete the EPDM layer…at last.


After the roof was waterproofed we were really exhausted and decided to take a short break – our first holiday in several years. A welcome rest.
Other jobs:
a) Insulating the Void: The void between the top of our straw bale walls and the underside of the roof was insulated and covered with wood fibre board.
For the insulation we used both hemp lime and wood insulation. We purchased the hemp lime from Marcus at Hempire Ltd. We were aiming to fully insulate with hemp lime, but as it needs to be shuttered into place, it was really difficult and impractical to try to insulate right up to the underside of the roof with it. We decided to insulate the lower part of the void with hemp and complete the rest with wood insulation.
This was quite laborious, about 4 tonnes bucket-by-bucket, working under the roof overhang. Ideally this could be sprayed into the shutters if there is equipment or a contractor available to do it.


b) Installing Wood Fibre Boards
When we finished adding hemp to the void we bought some external and internal Pavatex wood fibre boards (40mm) from Acara Concepts. This product is a very ecologically sound one, as it is made without any bonding chemicals or deleterious practises. It also performs very well as an insulating material, and it allows for breath-ability and acts as a thermal mass.
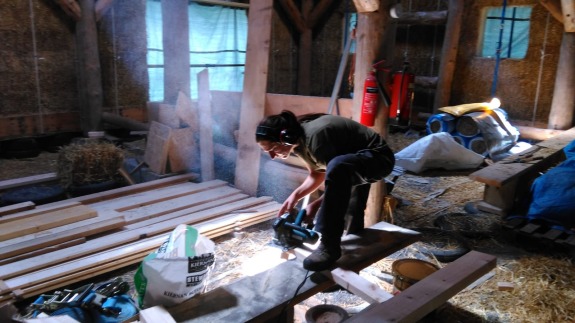
The external boards are slightly smaller but much more densely packed than the internal ones. The were affixed to the wooden framework we built on top of the bales at 400mm centres. This job involved a lot of cutting as the fibre boards had to be shaped around the roundwood rafters. It was also slow moving as it involved working from a scaffolding deck.


Wood fibre boards in place
c) Windows and Doors
Openings in walls are very obvious places where water can ingress, and where heat can escape. For straw bale walls, dampness can lead to rotting straw which has to be replaced if it cannot be dried out, and it is a very difficult problem to correct. This is one of the most important details in our walls.
We began looking at windows and doors after we started building our walls. We visited several showrooms and searched for ideas. In order to satisfy building regulations, our windows need to achieve a U Value of 1.2, and our doors a U Value of 1.4 (or better) – these values could be achieved with double glazing.
Luckily my cousin Joe at Finlay Build is an agent for Camden Windows. As Finlay Build is a local firm Joe was able to spend a good bit of time discussing our requirements and providing us with excellent on-site advice. We decided on triple-glazed UPVC windows and doors which were installed in September, increasing from double to triple glaze added approximately 10% to the total cost, which we decided was worthwhile. This enabled us to achieved an improved U Values of 0.9 for the windows, and 1.2 for the door.

As well as installing windows we had to decide on our window sills. Wooden sills, whilst appealing, are rarely installed locally. Concrete sills weren’t desirable and would have been too heavy to work into the straw, so this left aluminium sills. We worked out some of the detailing with Joe who installed the windows and then we contacted David Gorry at Gorry Stainless Steel who manufactured our sills.
We found it very useful to use locally based suppliers and manufacturers. One of the lessons we’ve learned on this build is if there is something that you require to be made bespoke, it is vital to be able to speak directly to the person who is making it, particularly when the tolerances are only a few millimetres. This relationship with the suppliers or manufacturers is more easily achieved when dealing with local, small-scale firms.
The windows and sills were installed in a day and a half. The roof was waterproof and we now began preparing for plastering!
d) Preparation for Plastering

We thought that we’d have time for plastering before the weather got colder. However some early frosty weather in October meant that we had to cancel plans for plastering this year and complete it in late Spring 2020 (lime plaster needs to avoid temperature below 6ºC or it may crack before drying).
Currently we are working on installing our raised wooden floor and ideally would like to have the floor completed (including the underfloor heating system) before we begin plastering next year.
We do hope to complete our house in 2020. It is impossible, at this stage, to suggest an approximate date as delays and difficulties will always play a part in any building timescale.
We do think it’s realistic to be finished some time next year…