
We’re both really delighted and relieved having finally moved into our home towards the end of October. It has been a huge task to complete our house, and now we finally have a home. What we have built is better than we had hoped we could achieve. There were so many things we didn’t know how to do and working together has been one of the best parts of this whole experience. We’ve been woodworkers, designers, ground workers, carpenters, plasterers, labourers, roofers, tilers, painters, cabinet makers, and a host of other things. The experience of living in the house you’ve built yourself is ineffable, we are so deeply embedded in everything. We’re so glad to be finally in.
This year, for a variety of reasons, we were not able to work on our house for several months. Even when we were able to work on it, we experienced lots of delays, especially when engaging other trades, and waiting for materials. It seems that the post pandemic demand for trades people has not diminished. Despite all this we did get everything completed that would allow us to move in.
Many of the jobs we needed to complete this year were mainly finishing touches (e.g. kitchen cabinets) and snagging, which may sound easy, but these jobs involved countless choices and decision about colours, materials and methods. Finishes are visible and time-consuming to get as good as possible. We have improved our skills over the years building our house but most of the jobs to be completed were ones we’ve never done before.
Soffit
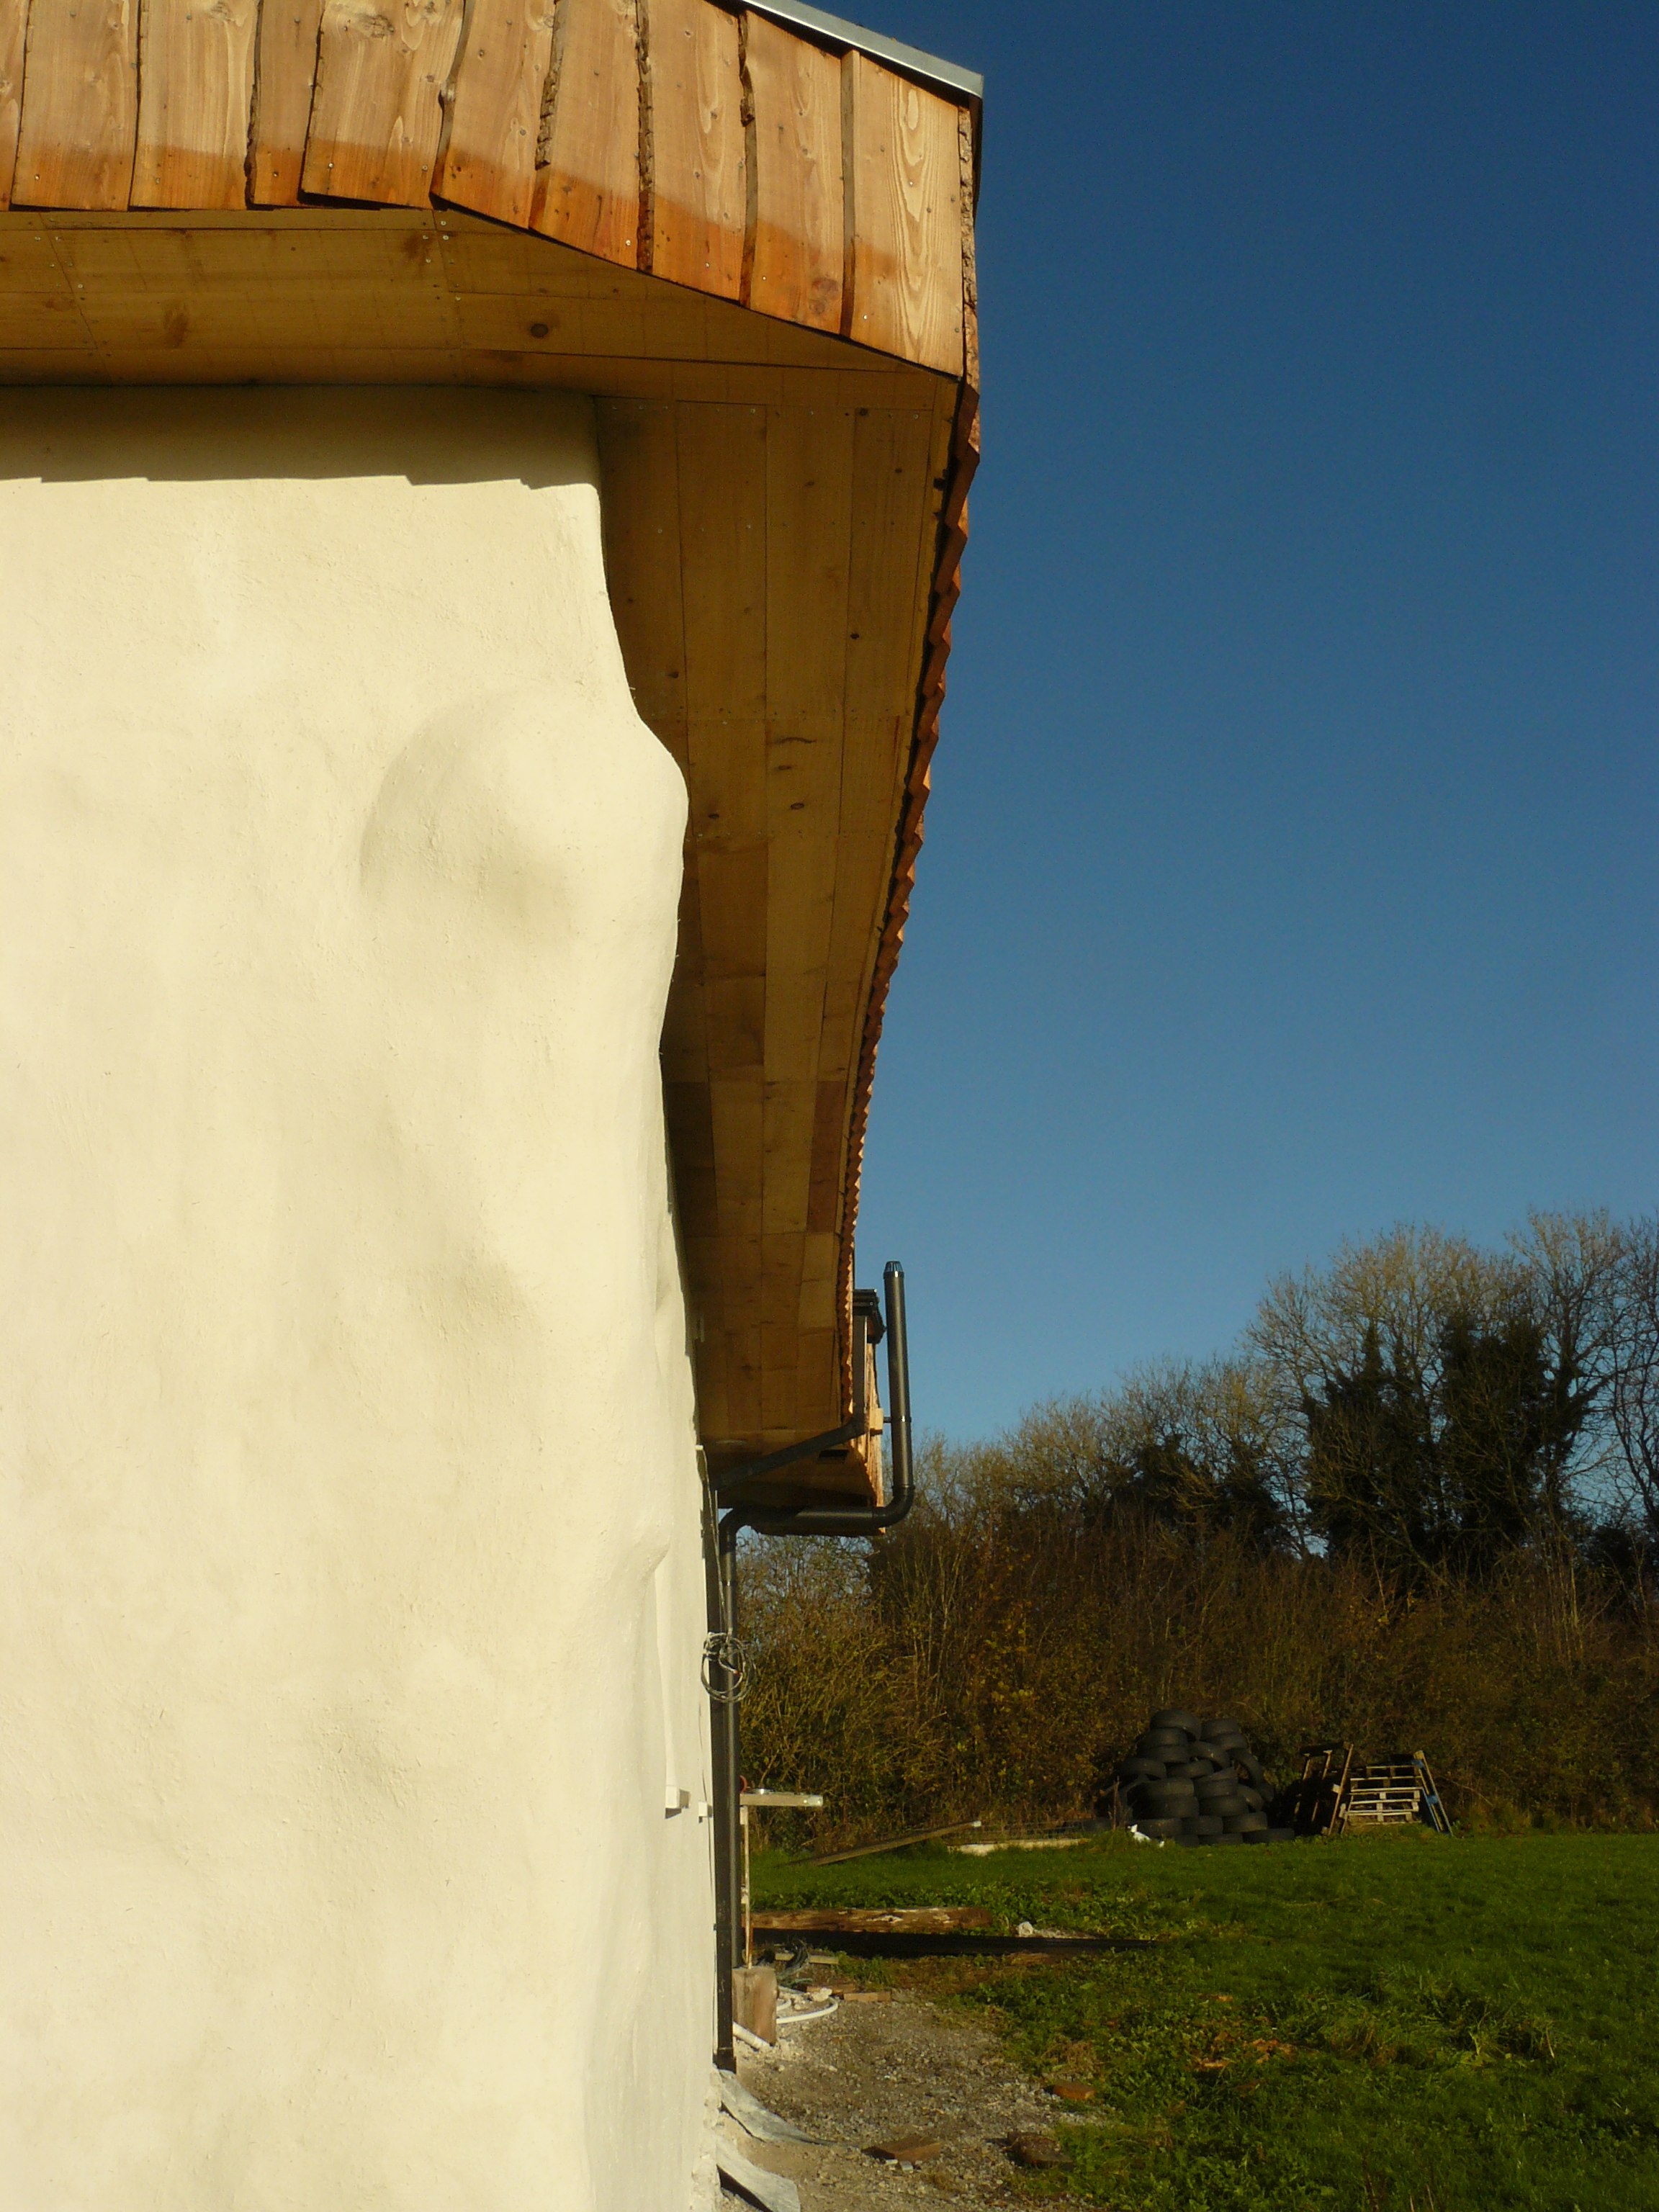
The soffit is the underside of the roof eave or overhang. It needs to be sealed off for practical and cosmetic reasons. We used lengths of 15mm (half-inch) rough-cut spruce for this. As our outer wall was slightly irregular, we used a laser level to find the exact middle of the soffit. We then screwed two lengths side-by-side and made cuts, if necessary, to the outer and inner lengths (see photo below left). We added battens, attached to the overhanging roof rafters to hold the soffit timbers in place and to keep them level.


Due to the different angles of the reciprocal roof rafters, the soffit on the south and west side of the house involved a lot of additional preparation. It was one of the last jobs we needed to complete before taking down our scaffolding, and it made a huge difference to the appearance of the building. It was really satisfying to seal of this part of the roof (see photos below from south east corner).
During the Spring one family of swallows and three families of house martens had made use of the overhang to build their nests and raise their young. We look forward to them returning again next year, as their cheery, chatty, birdsong always brings a smile.

Kitchen
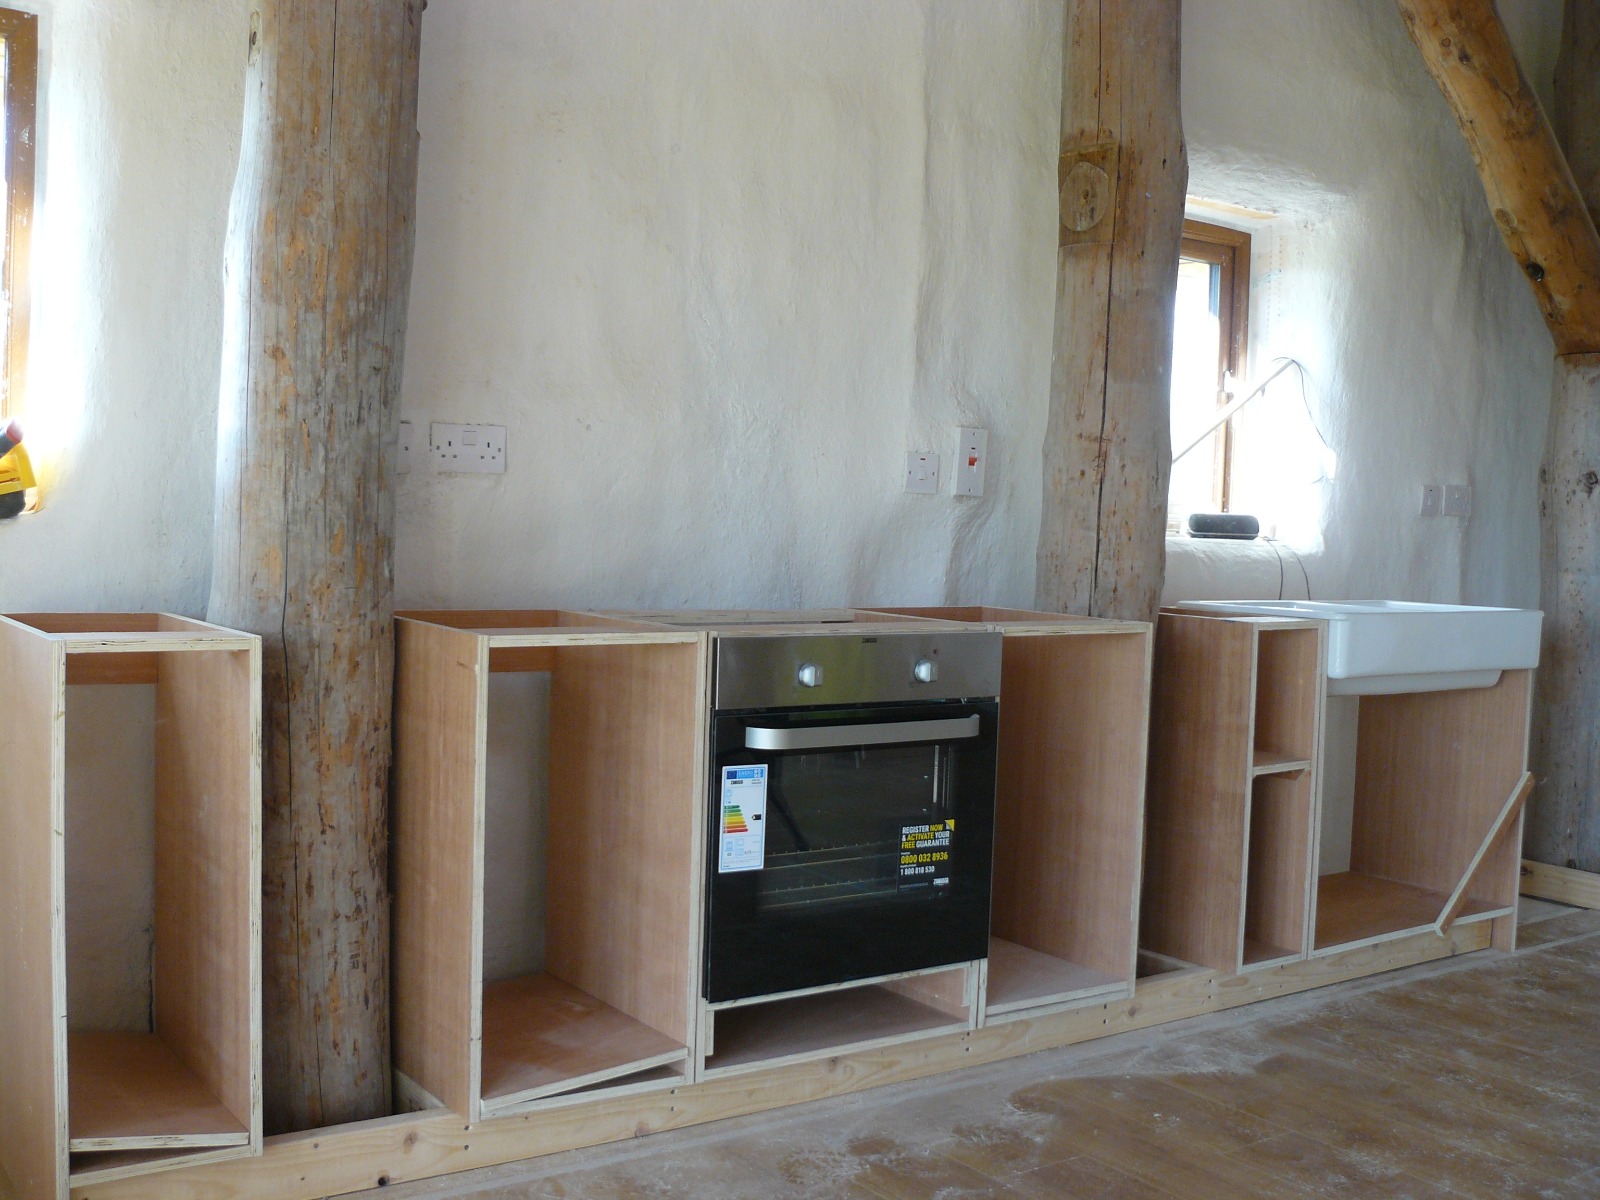
For our kitchen we decided to design and build it ourselves. The likely costs of such an off-standard design was likely to be very expensive and we were confident we could achieve a good quality finish, given the skill we’ve developed over the course of our build. I found the Houseful of Handmade site really useful for getting started on this. It has lots of helpful ideas and some designs, which are easy to follow or change to suit your specific situation.
We drew up several different plans for the kitchen before deciding on the final one. When we were confident about our design and layout we used masking tape to ‘mock up’ the layout and tried to envisage movement around and through the kitchen area. We made several modifications before we began.
We made the carcasses for the cabinets with marine and birch ply. A really useful tool for this is a pocket hole jig, which allows for screwing pieces together at an angle which improves the joint’s stability. The units sit on lengths of 100mm x 50mm (4″ x 2″) which makes for a really sturdy base for the cabinets.

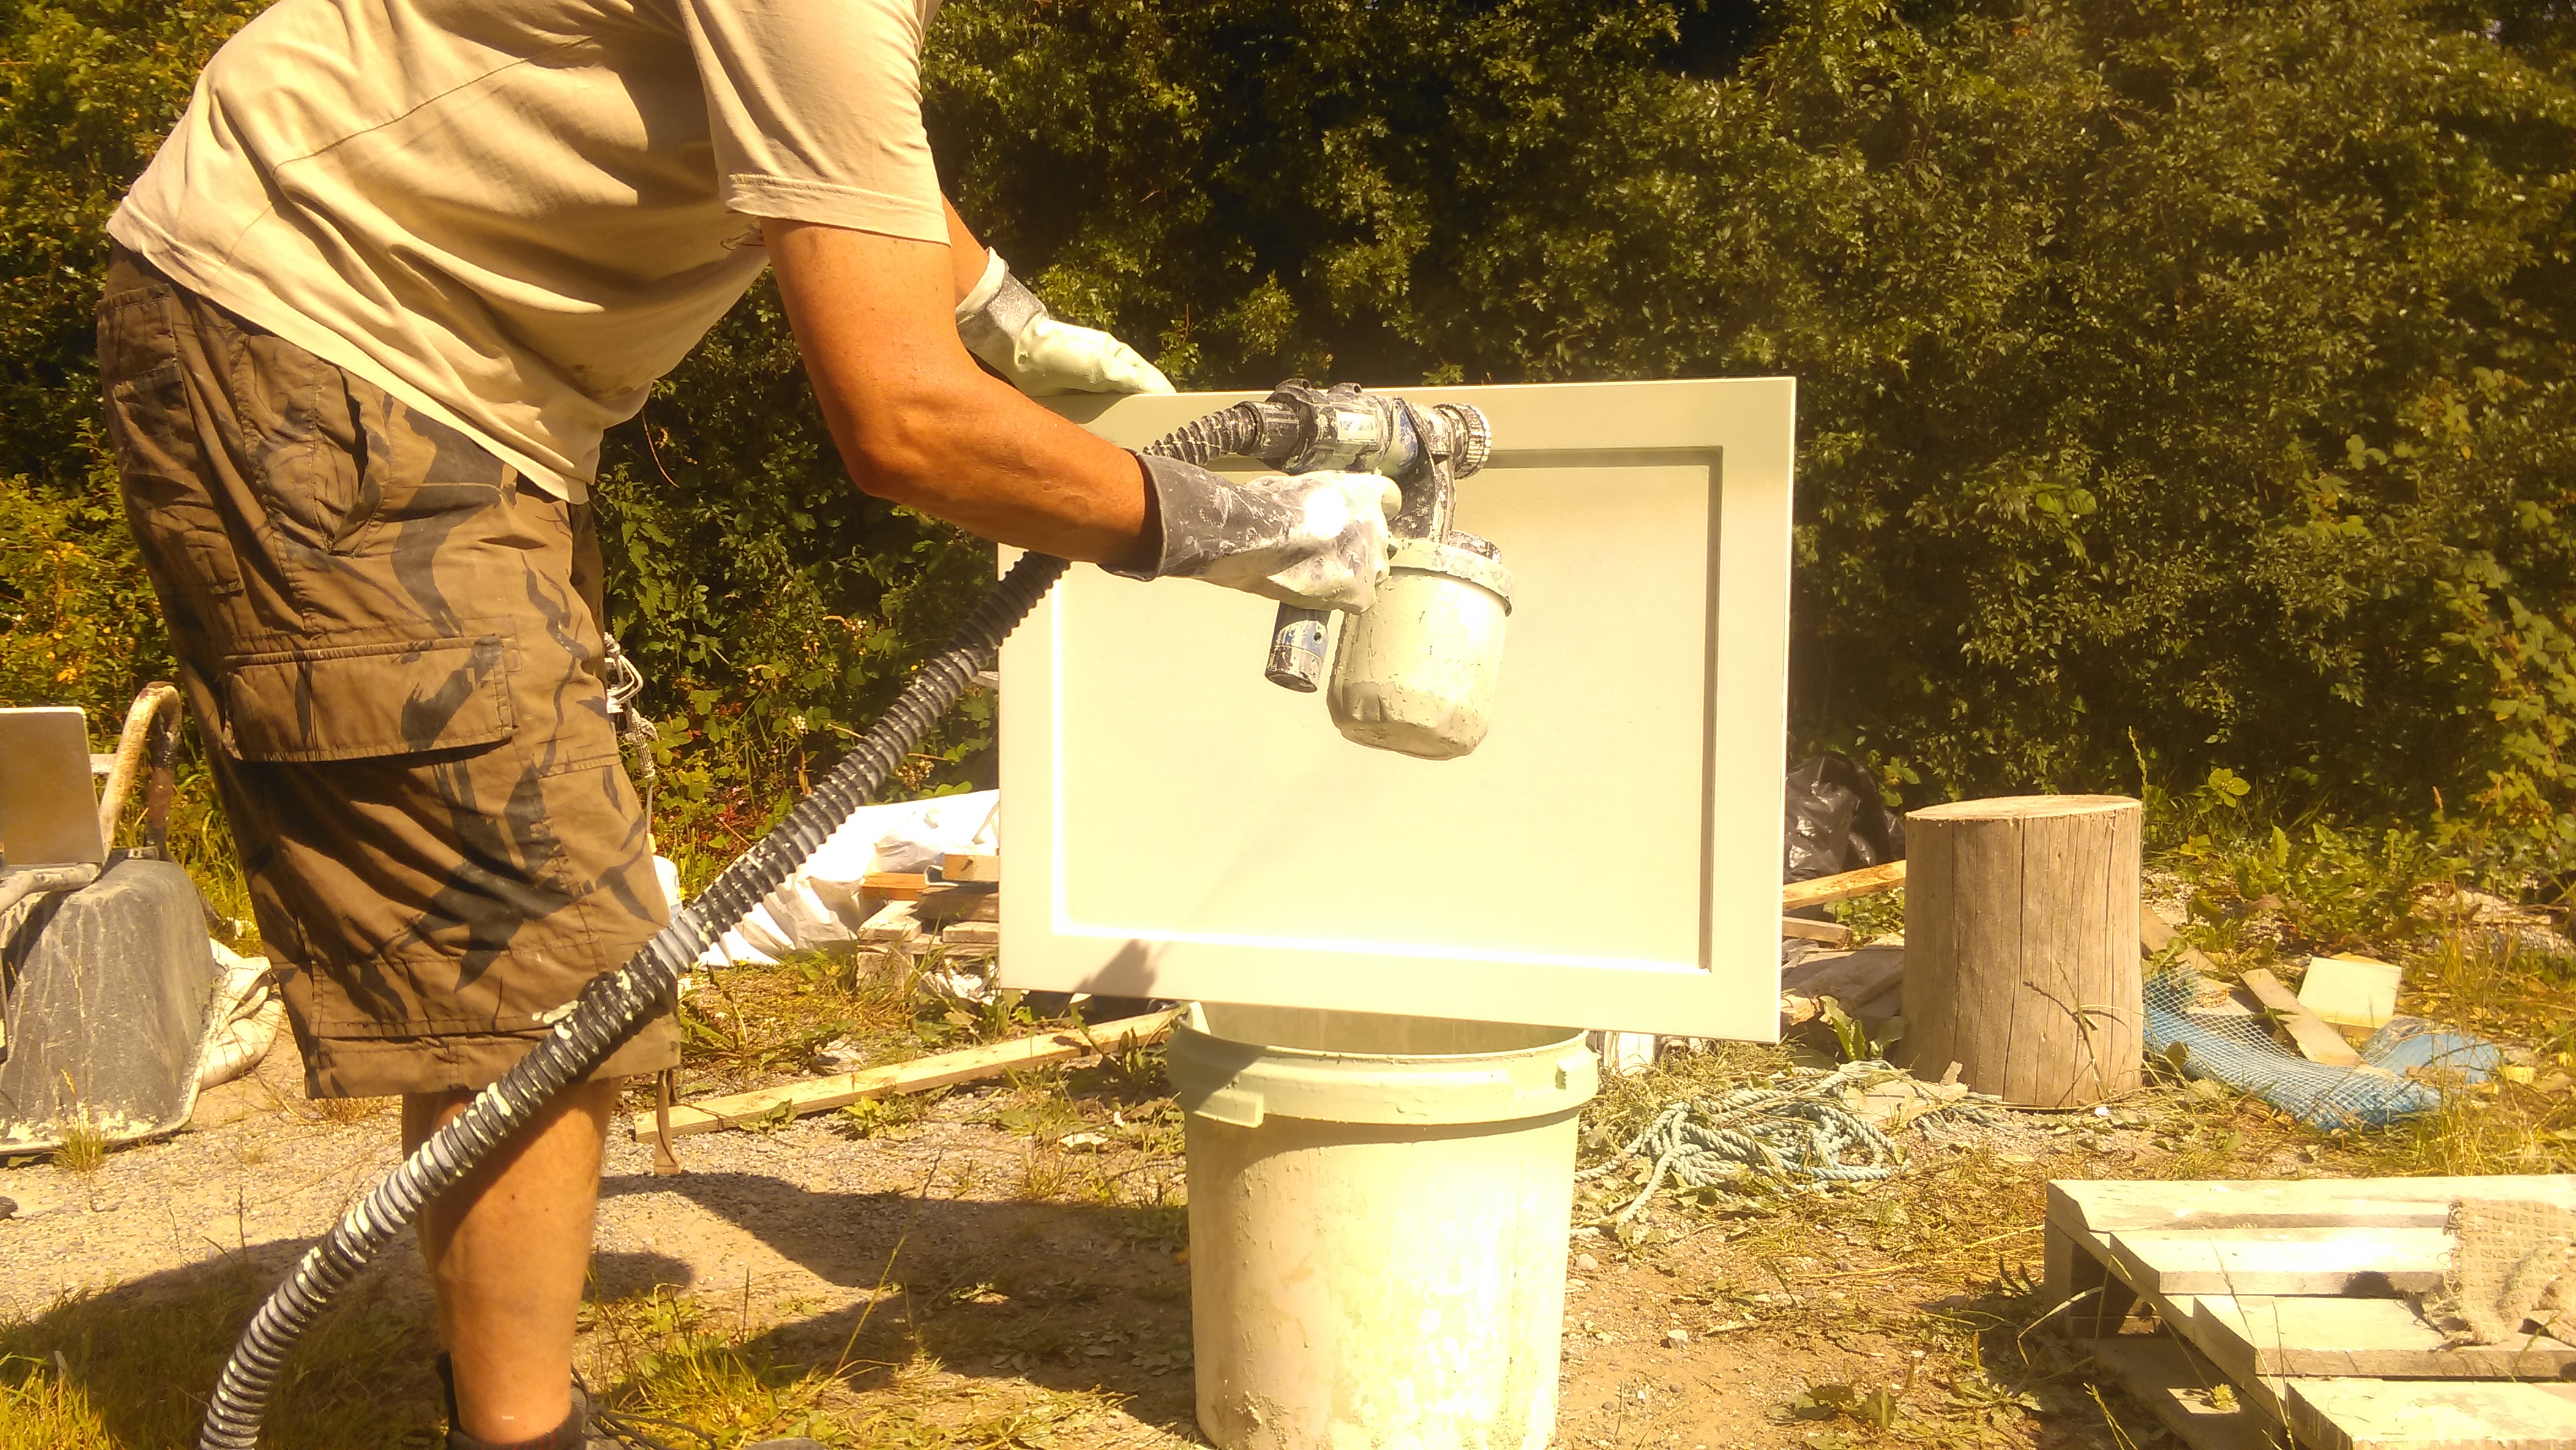
We got the cabinet doors made Shaker-style to compliment the other doors in the house. We sprayed them with special kitchen cabinet paint, which is durable and washable (from Castle Paints, a local supplier). This paint has several different constituents (hardener etc), and takes three coats, which combine to form a hard-wearing surface.
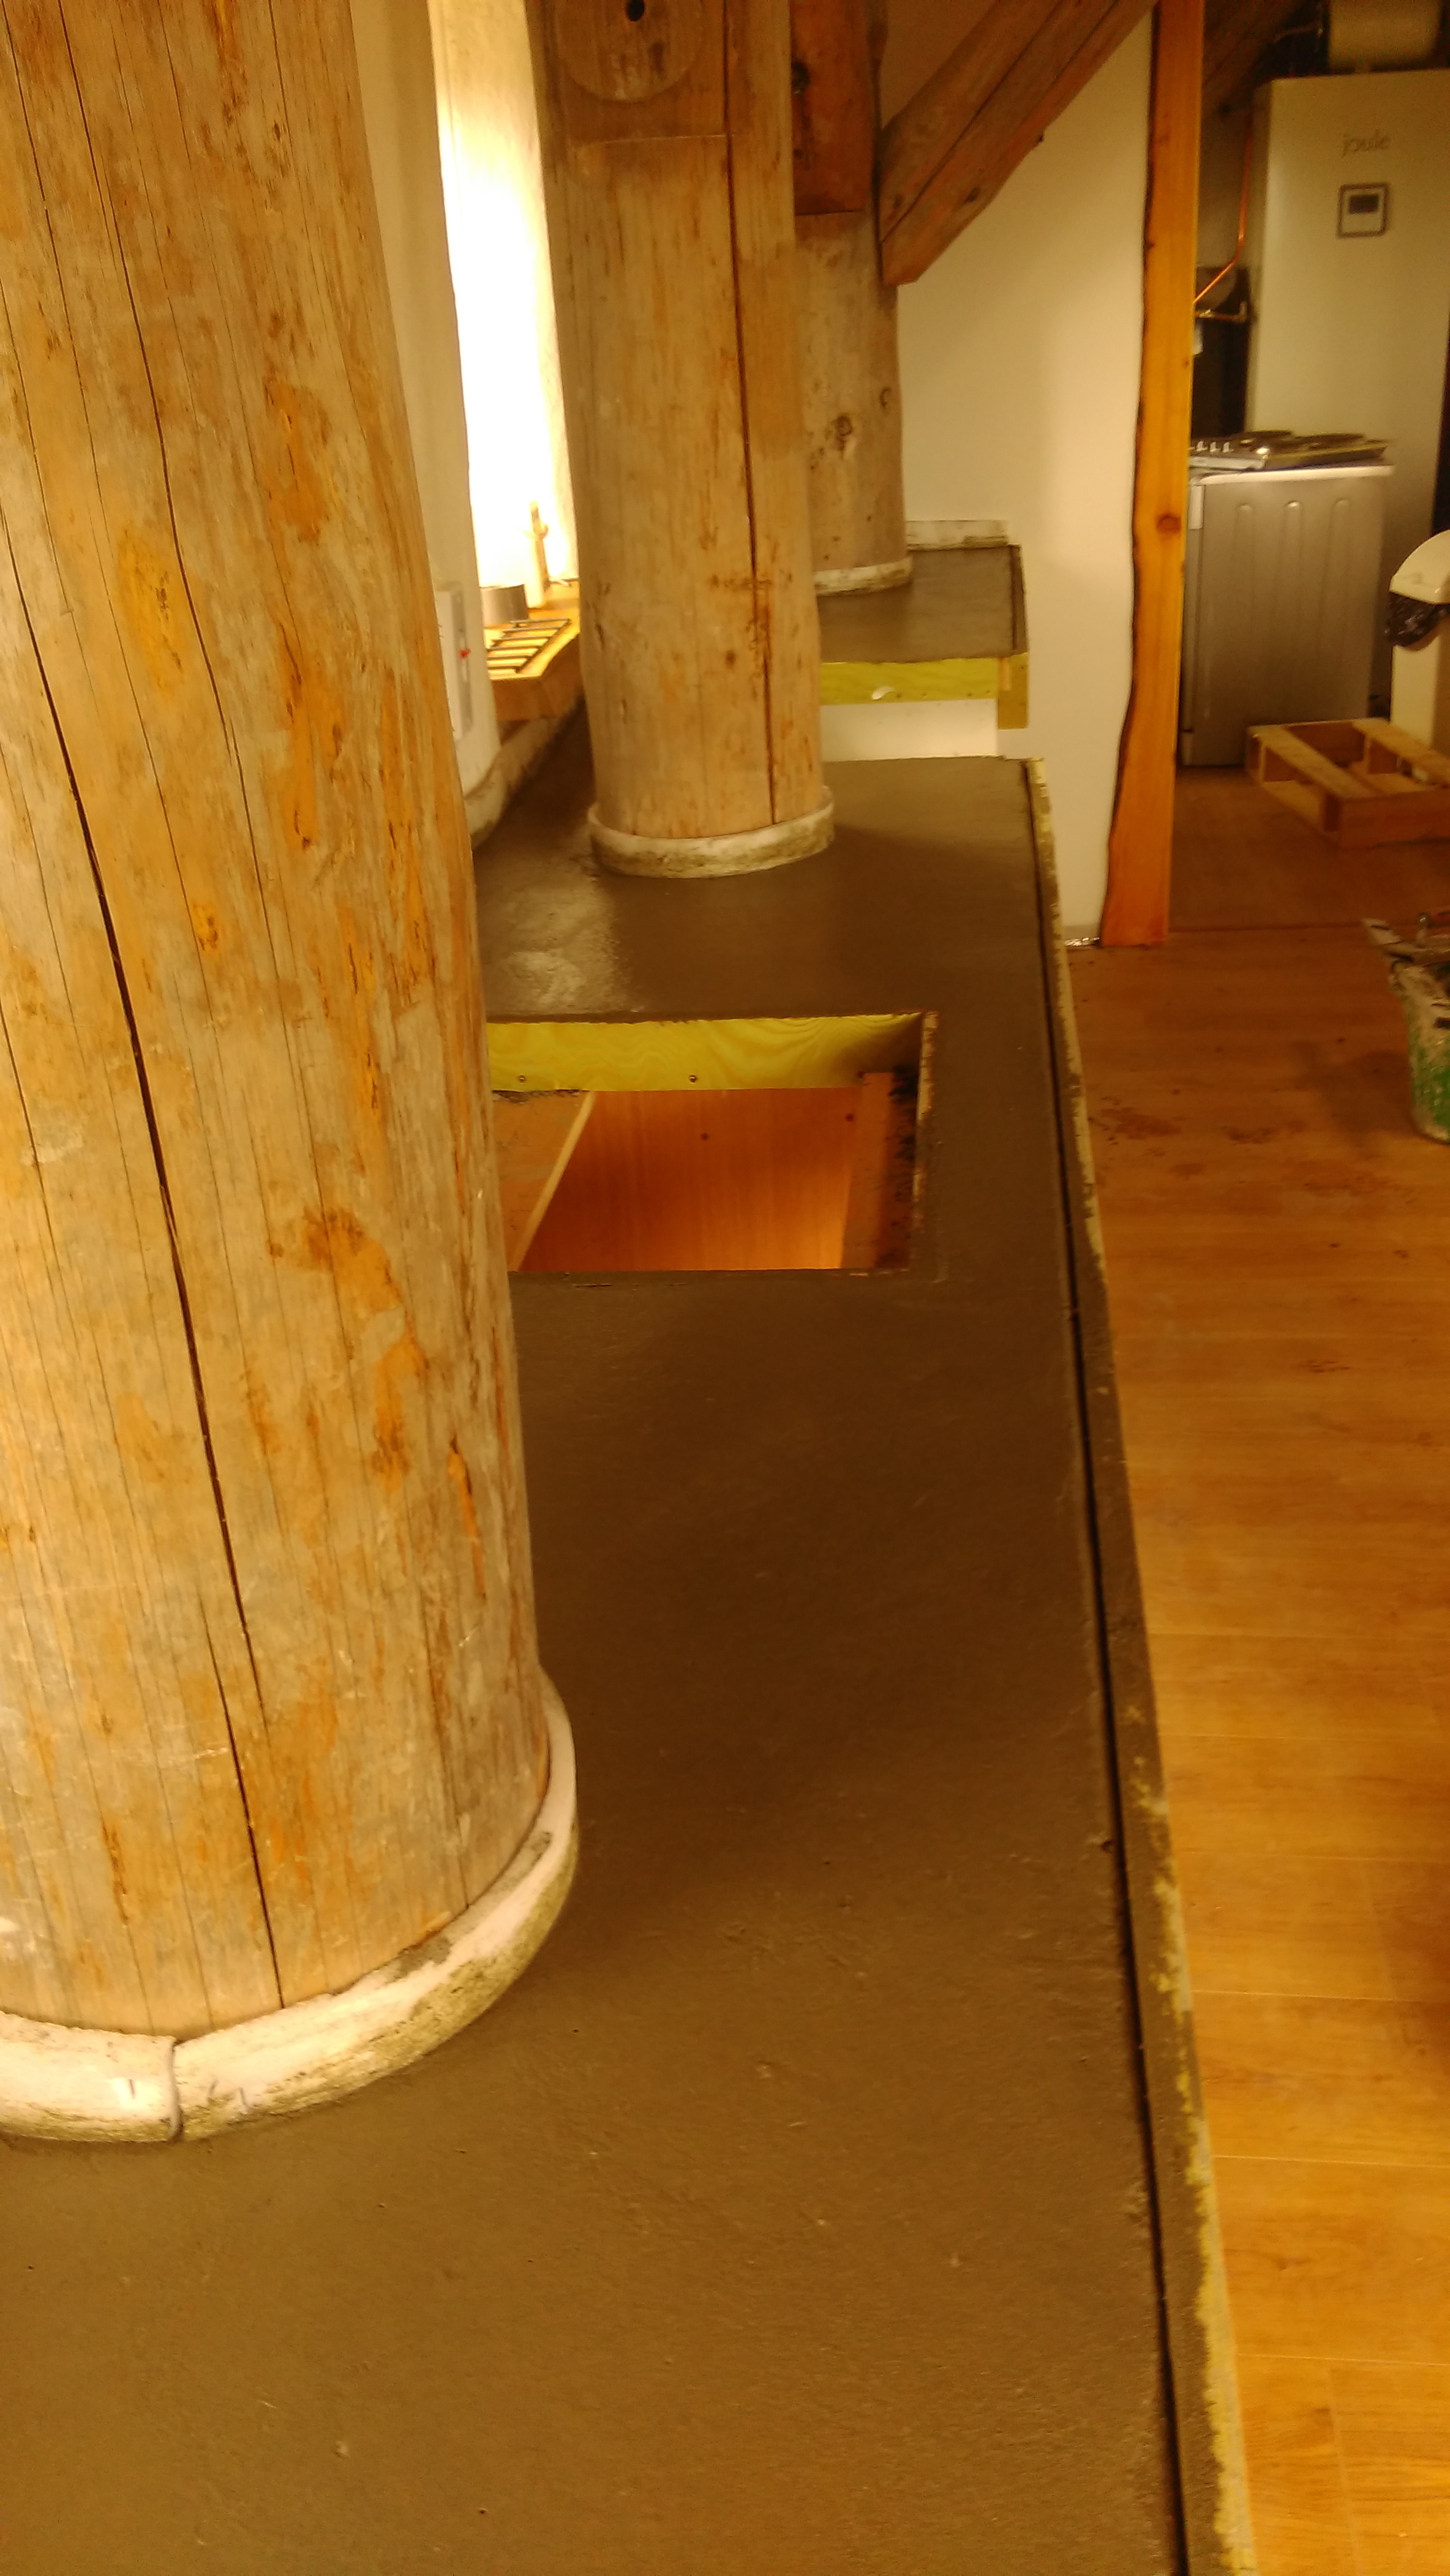
We had initially thought that we’d have a wooden counter top, however, because of the three posts, cooker and sink in the same area, it would be really difficult, if not impossible, to do this in one piece. The counter top would need to be constituted of several different pieces and need several joins to connect it all together. Not really an ideal configuration for a counter top.
The only solution to this was to make a pourable counter top. Normally concrete counter tops are poured into a form/mould, allowed to dry and then turned upside down, and fixed in place. However, we were not able to do this and the counter top was poured in situ. We used pagged board as the base for the counter top. This board is able to absorb any moisture from the concrete mix, without swelling or deforming. We added some light mesh reinforcing for additional strength -and also added some of the micro fibres – we used in the plaster – into the concrete mix.
I found it useful to fill two mixers at a time to keep the supply of mix steady as it needs to be poured as quickly as possible. The counter top took about 4 mixes (roughly equivalent to 4 wheel barrows), the ratio was 3 parts aggregate, 2 parts sand and 1part cement, the mix was moist rather than wet. We added the first layer of concrete, tamped it, added some light mesh reinforcing, added additional concrete, and tamped and floated it until we were happy with the finish. We used an edging trowel to give a rounded finish to the top of the counter edge, and added a bead of silicone to the bottom of the mould to do the same. We placed an expansion gap around the posts and walls, and then we left it to cure for several weeks before it was wet-polished.

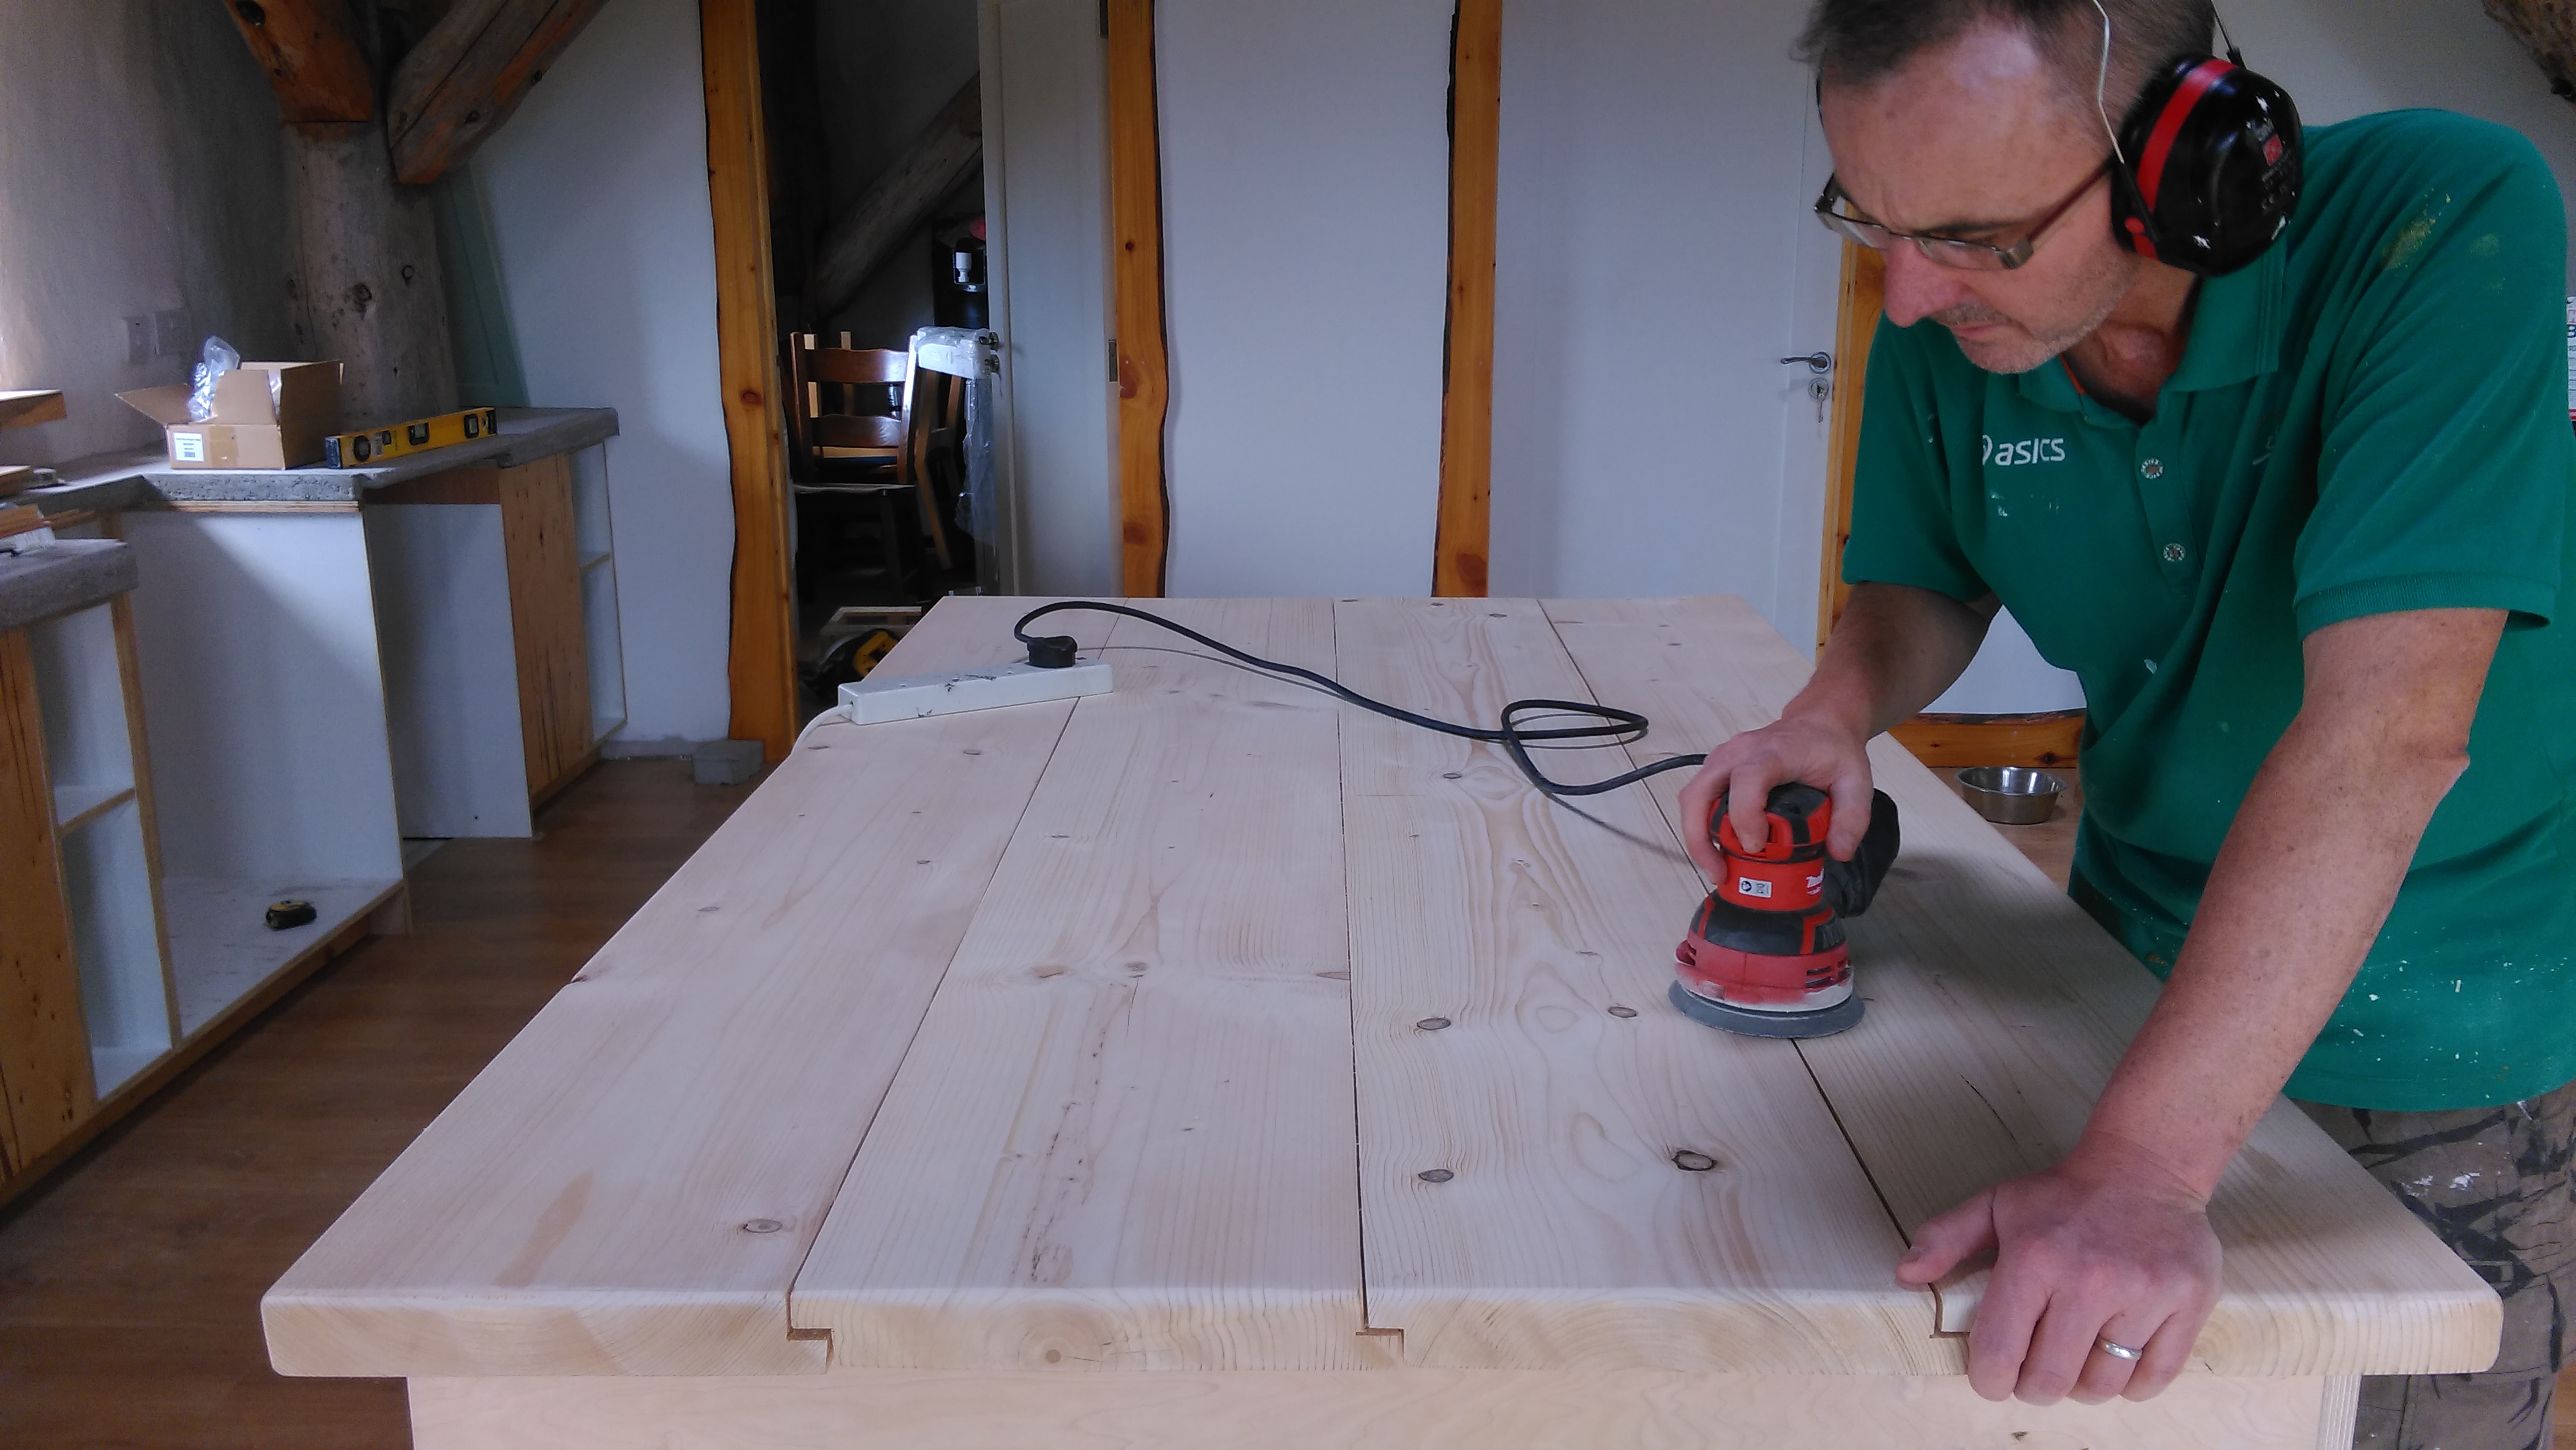
After several weeks curing it had changed to a much lighter grey in colour. The curing process has not produced any cracks so we were confident that the counter top was going to work. Polishing it involved using a wet polisher with 8 different diamond sanding disks – staring with 50 grit, which removes any large bits, and continuing up to 3000 grit which is polishing the surface (see below). We sheeted off the kitchen area, as this process can produce lots of dust etc, even when wetted regularly. Finally we added several coats of H-Seal concrete counter top sealer, which is also food safe and washable.


Kitchen Island
Our kitchen is somewhat unusual as there are no wall-hung cupboards. This is mainly due to the presence of three large posts which make it impossible to accommodate any. We made the island to increase our storage, and to provide a centre point for the kitchen area. The lack of wall-hung cabinets actually declutters the walls and makes the kitchen area more spacious.
We used marine and birch ply for the island. We had a length of timber (300mm x 50mm (12″ x 2″) left over from the ones we used for the wooden ring beams which we made at the beginning of the build. They were planed, sanded, and treated to make the island top. I used simple rebate joints to fit the boards together, filling any spaces with wood filler. It was then sanded several times to get a nice, smooth finish, before treating it with counter top oil.

For the drawers I used dovetail joints to ensure that the drawer structure would be very solid, and that the drawer face would would be secured. This is an important detail as the drawer face receives considerable use and if it is not properly jointed, it may become lose. I found John Bullar’s instructional videos really useful for learning this skill.
For additional storage we built some shelving in our utility room, which also houses fridge, freezer, water tank and heating unit.
Window Sills
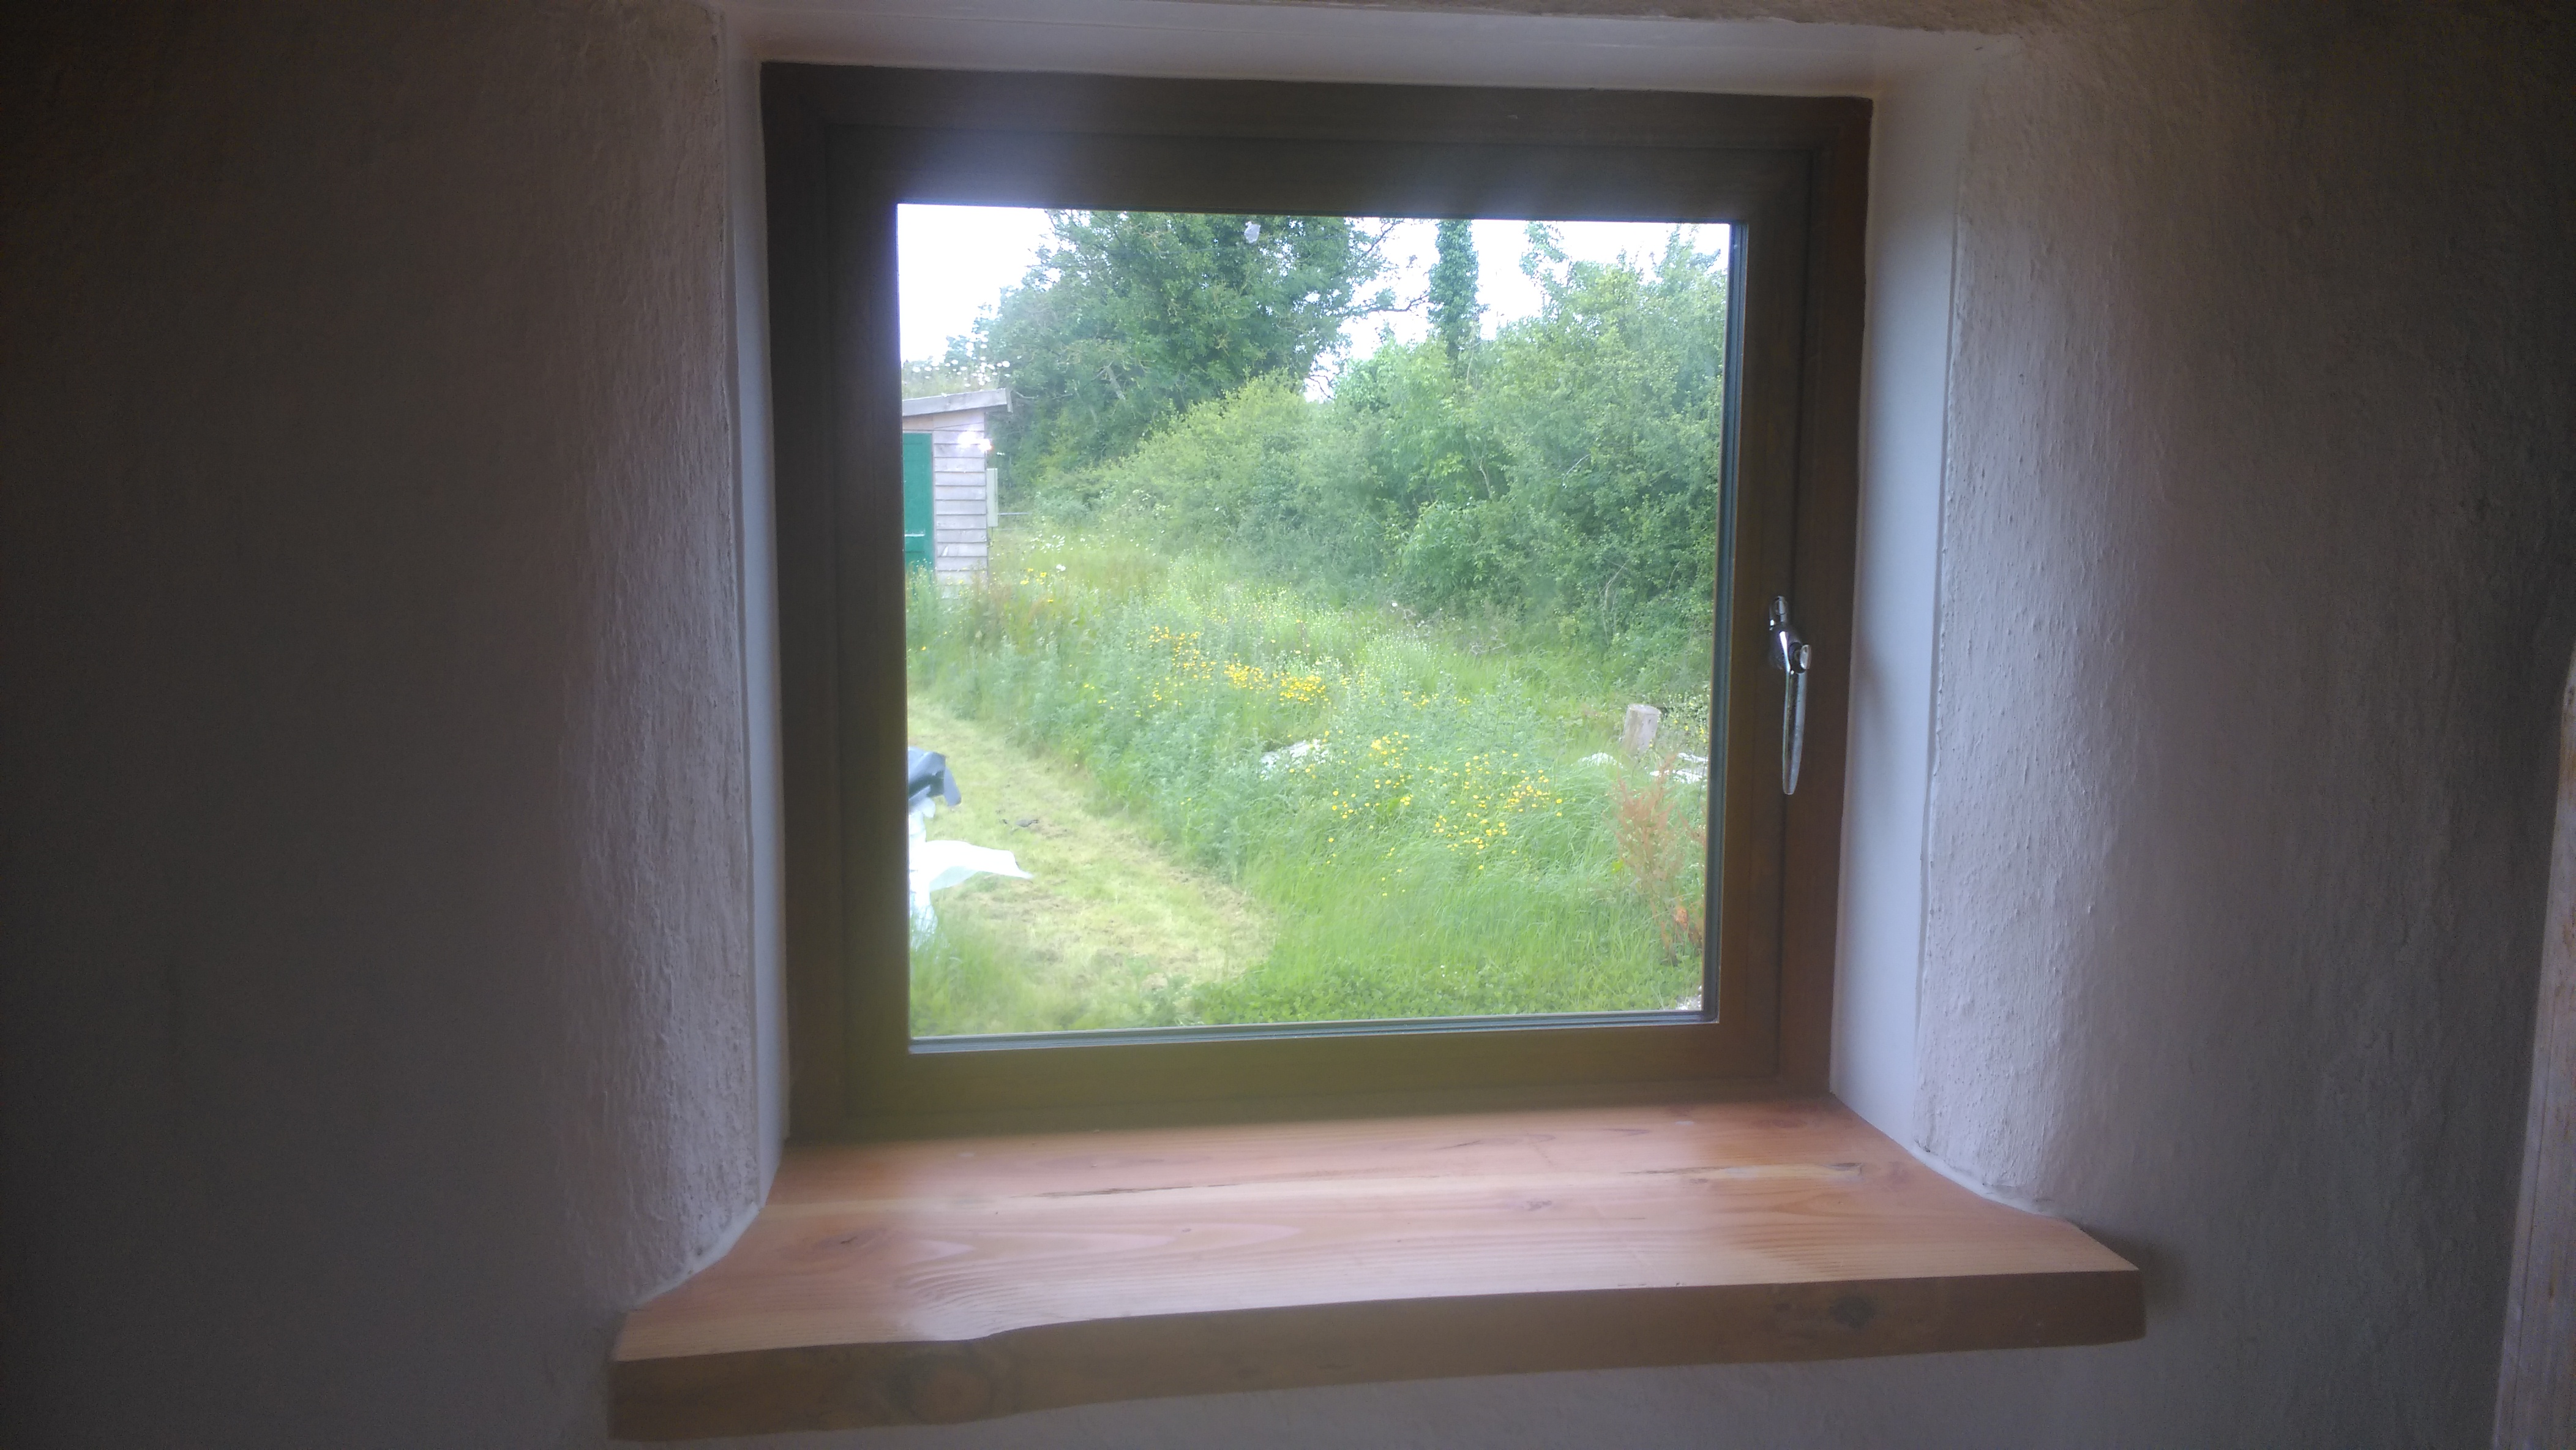
During the earlier construction of our wooden frame we kept several long (1m+) off-cuts from our posts and beams to be used for the internal window sills. These stumps were air-drying for a couple of years and before making them into window sills, they were kiln dried and cut into slabs 50mm (2″) thick. These slabs were then planed and jointed together to make 11 natural-edged window sills about 400mm (16″) wide. We then cut them to fit the window openings, and finally, they were treated with Danish oil and Osmo Top Oil.
The natural edge of the sills really compliments the undulating contours of lime-plastered internal walls. Their ‘chunky’ thickness is also in keeping with the proportions of the house.

Bathroom
We installed a quadrant bath and shower unit to maximise space in this room. A large post and braces is located in the corner of the room, which does take up quite a bit of space and requires fixtures and fitting to be worked around these features. We tried other shapes in this space, however, the quadrant shape offers the greatest use of space.
For the bath, shower and sink we applied tanking to the walls before they were tiled. This provides a waterproof and flexible layer of protection for the walls, and seals to the bathroom fixtures. It’s an extra layer of protection in case there are any cracks in the tile adhesive. Tiling the walls was fairly straightforward. We found it really useful to plan the layout of the tiles beforehand so that we could achieve symmetry in corners etc.


The bath has also a quadrant shape. We made up a wooden apron for it, as the fibreglass apron it came with really didn’t suit our bathroom. We added some plasterboard to the lime-plastered wall so that we could tile it. It was neither possible, nor desirable, to tile onto the lime-plastered wall. We were really happy with the finish we achieved here (see below)


Septic Tank and Percolation Area
This was the last major job we had to do before moving in. In some rural areas there are group water schemes, where you can connect to mini sewerage system, but our site is not located near one, so we had to install our own system which was part of our planning permission. Sometimes, the pipes and and tank are installed at the beginning of a build, but, in our case, we needed the site to store all our large round wood logs, and to be able to move it around the site as needed. We wanted to avoid a lot of traffic over newly-installed pipes.
A septic tank or domestic waste water treatment system, deals with the waste water from inside and outside (roof and gutters) the house. Waste water from inside the house is piped to a large tank where solids collect and are anaerobically broken down. The excess water is slowly percolated back into the ground via an extensive pipe percolation. The water which collects on the roof is piped into separate soakage pits filled with granular material (5-10mm), so that the water can percolate down into the soil. How you do all this is set out in the Building Regulations (Part H).
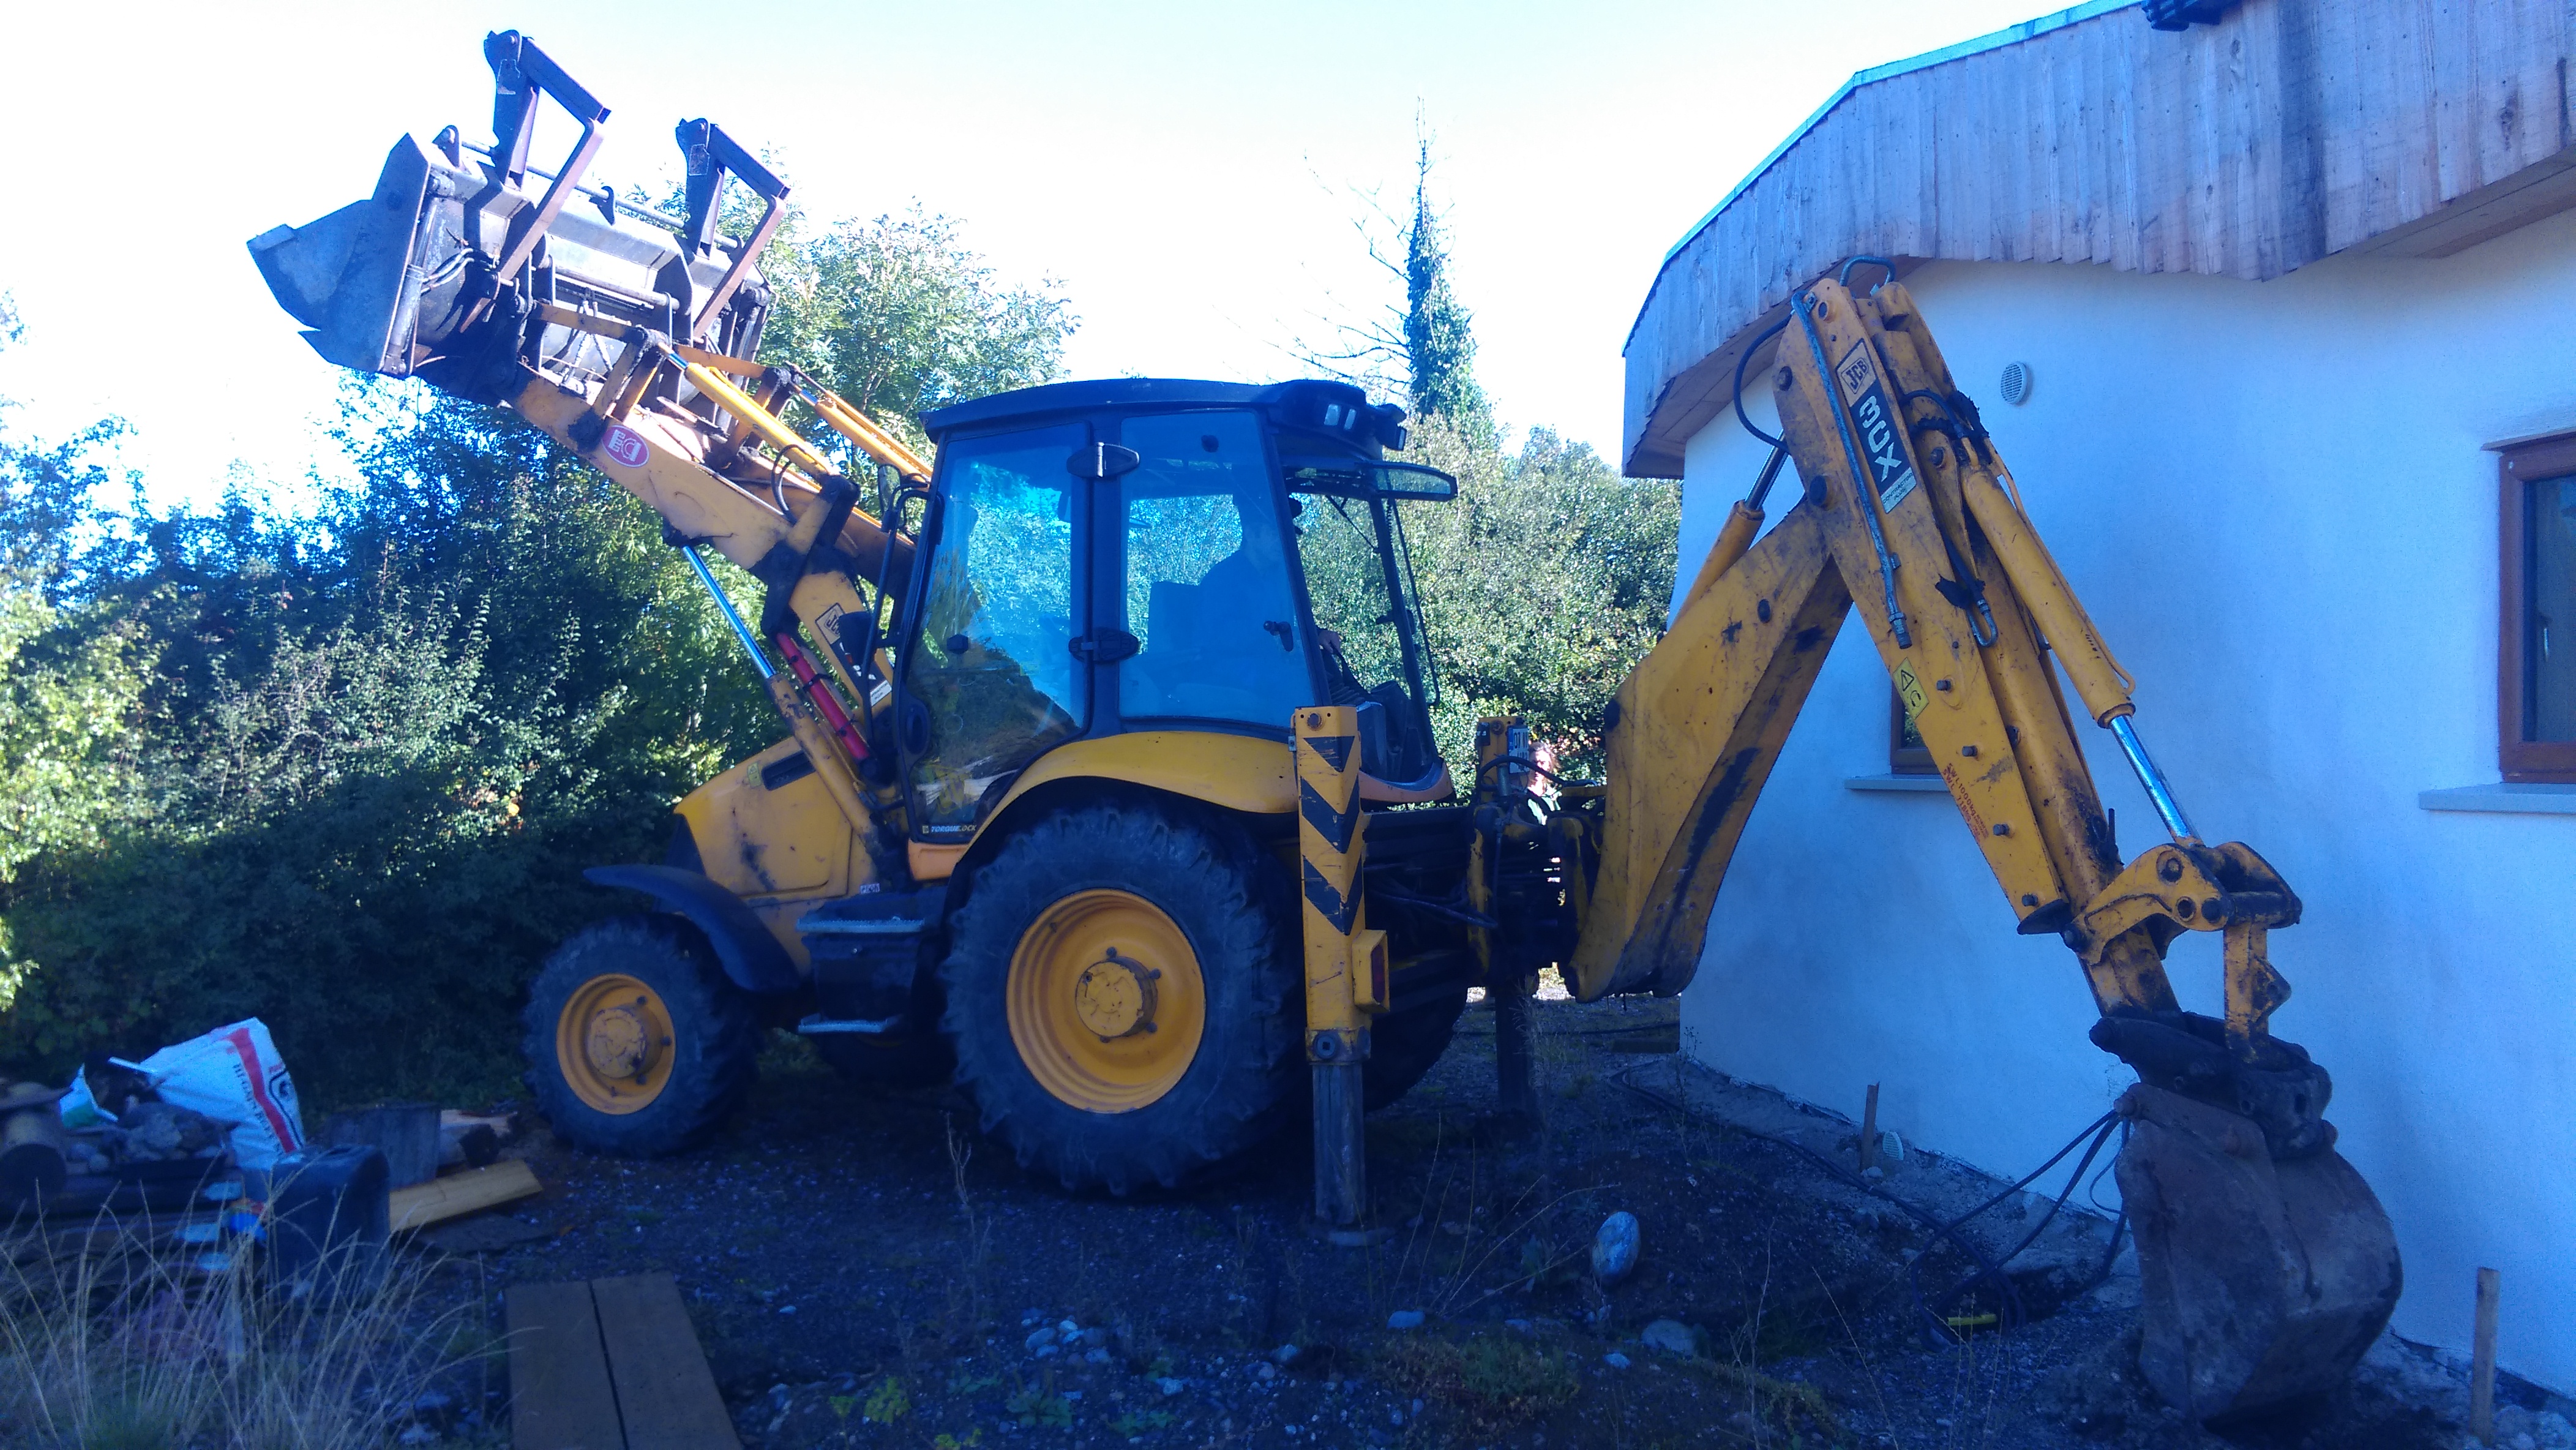
As there is a certain amount of engineering in this job, we were initially going to get a contractor. However, due to the surge in building activity for most of this year, it was difficult to get one, so we eventually decided to do it ourselves. Our local JCB man – who did the initial ground work on the side – worked with us again on this. His experience and advice was really useful for this job.

As this system relies on gravity for the waste water to drain away, the pipes need to be laid with a minimum 1 in 60 gradient. We used a water level (see left below) to maintain this gradient throughout. We laid all the piping for the septic tank firstly and then completed the soakage for the water from the roof. In addition to pipes, septic tanks and other fitting, installing this system also required over 40 tonnes of stone for the percolation area and for covering the pipes.

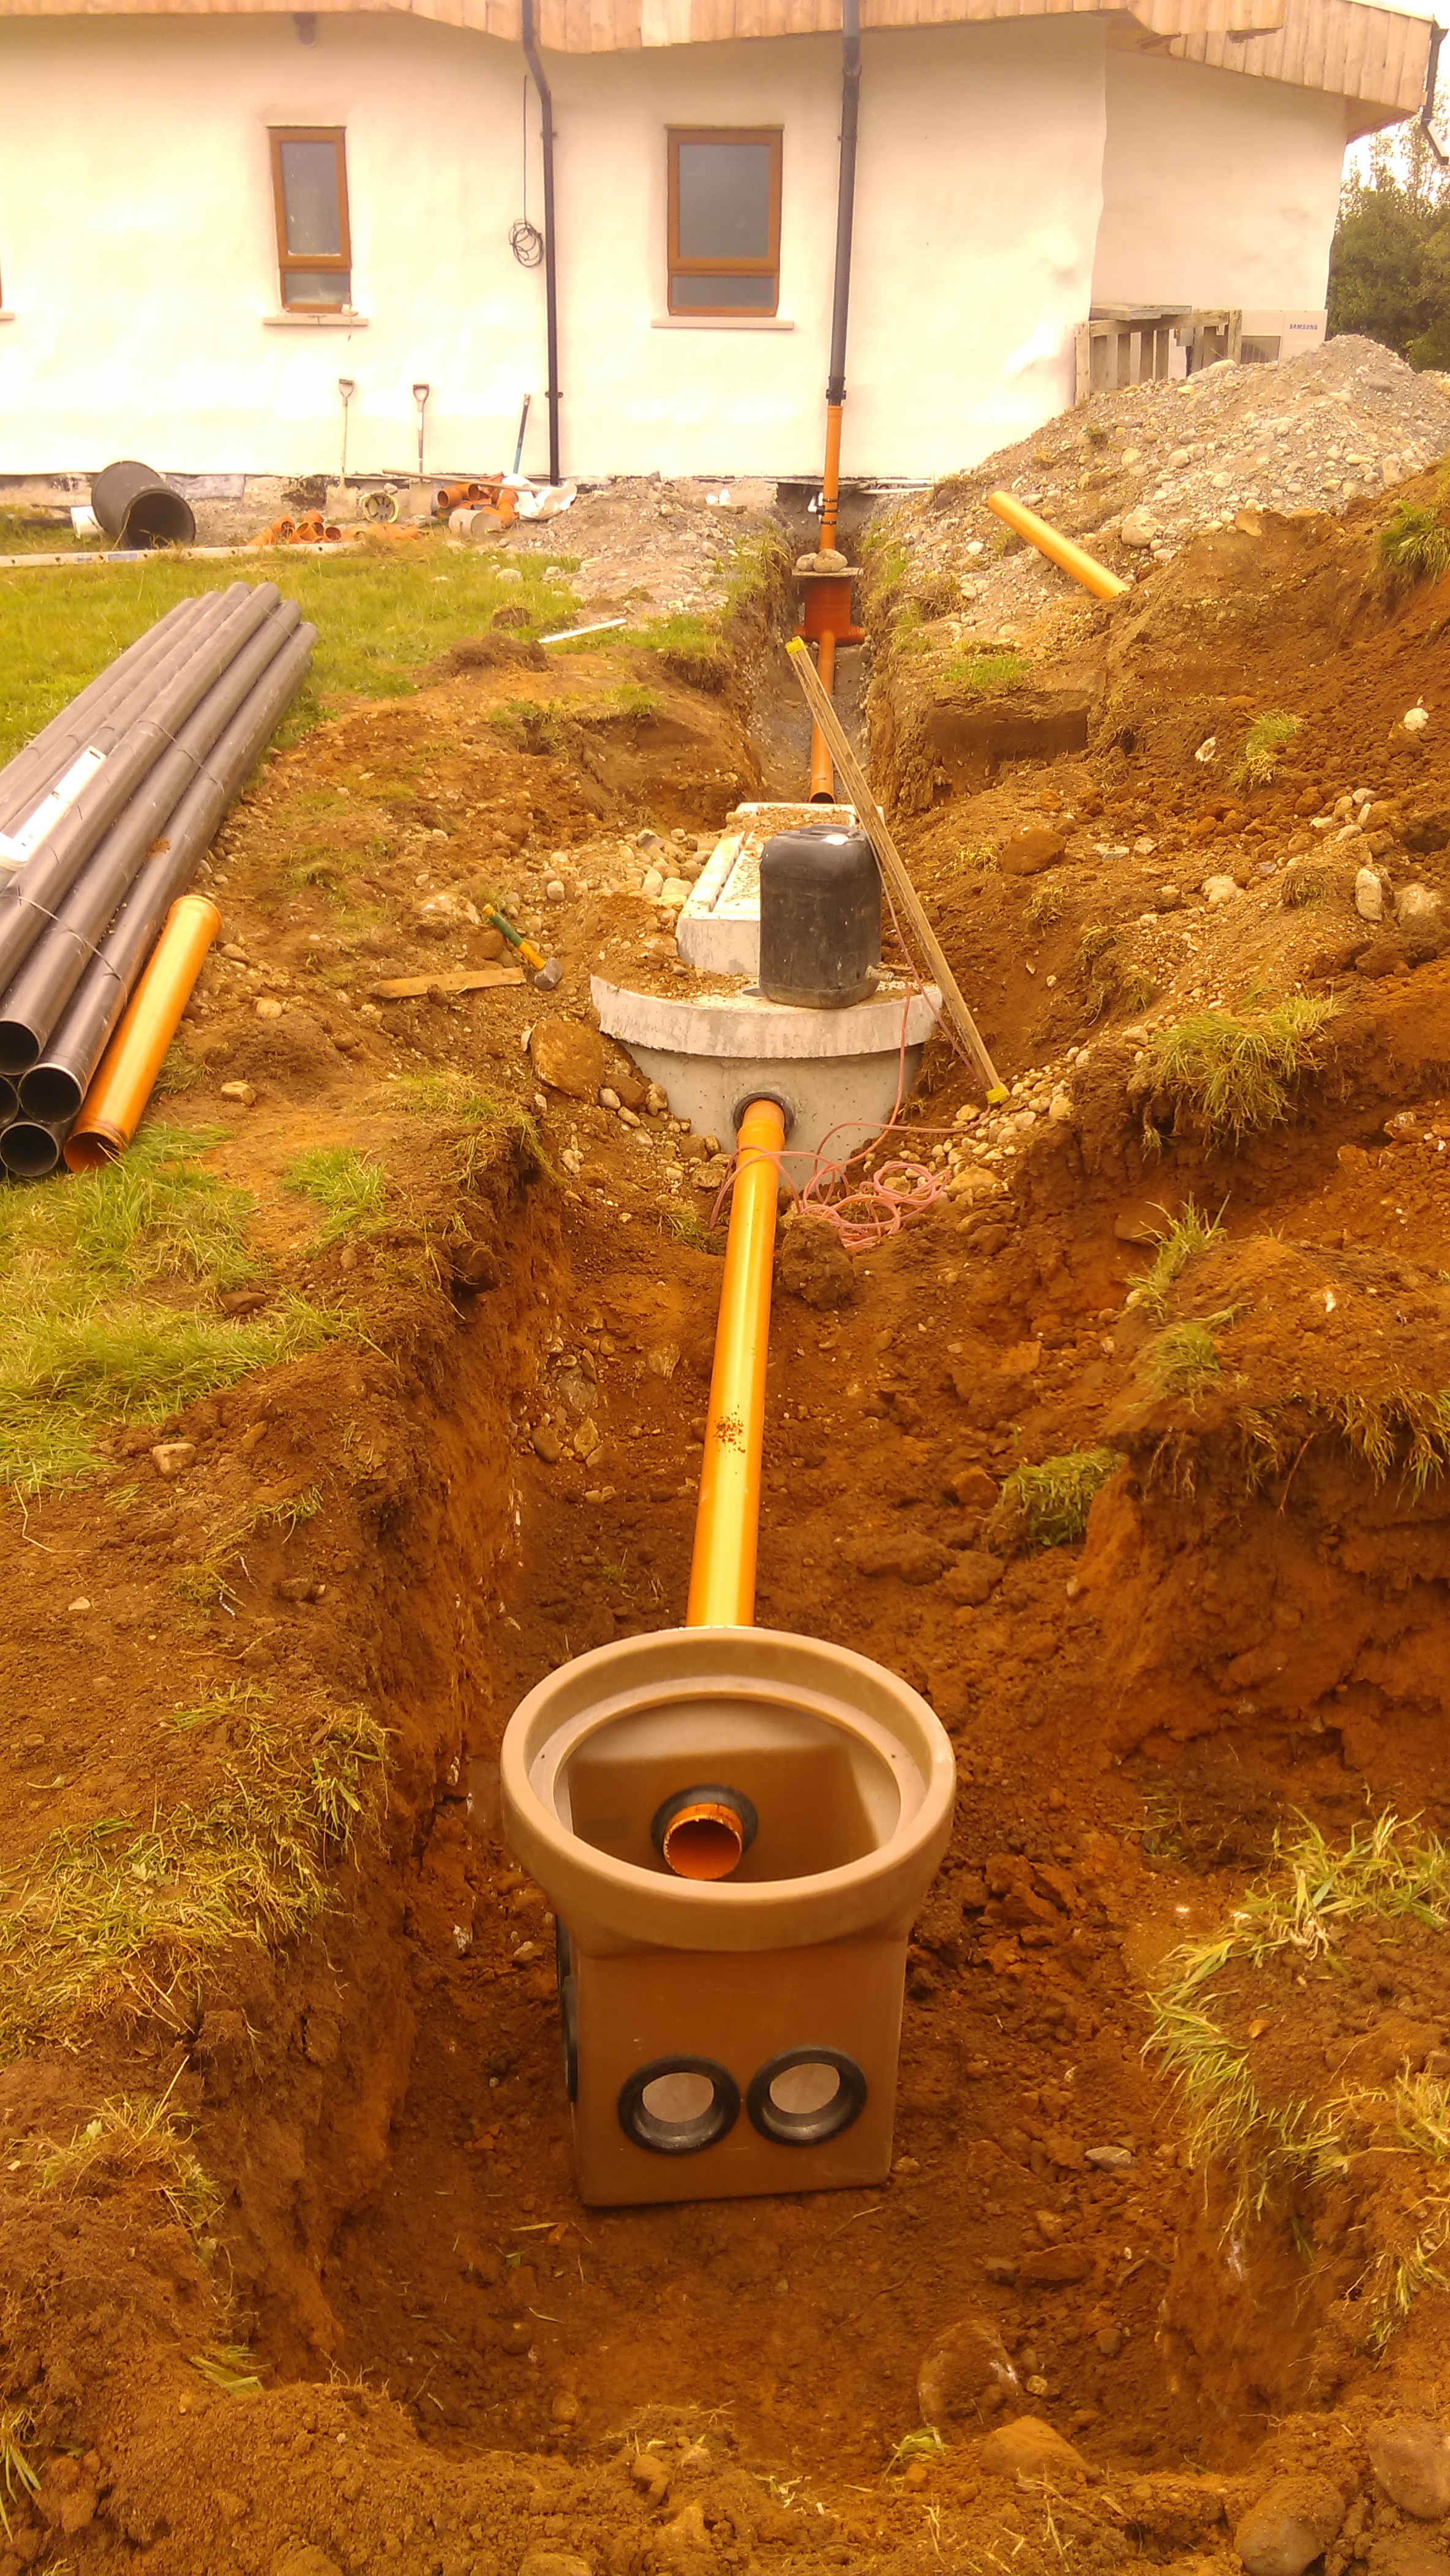
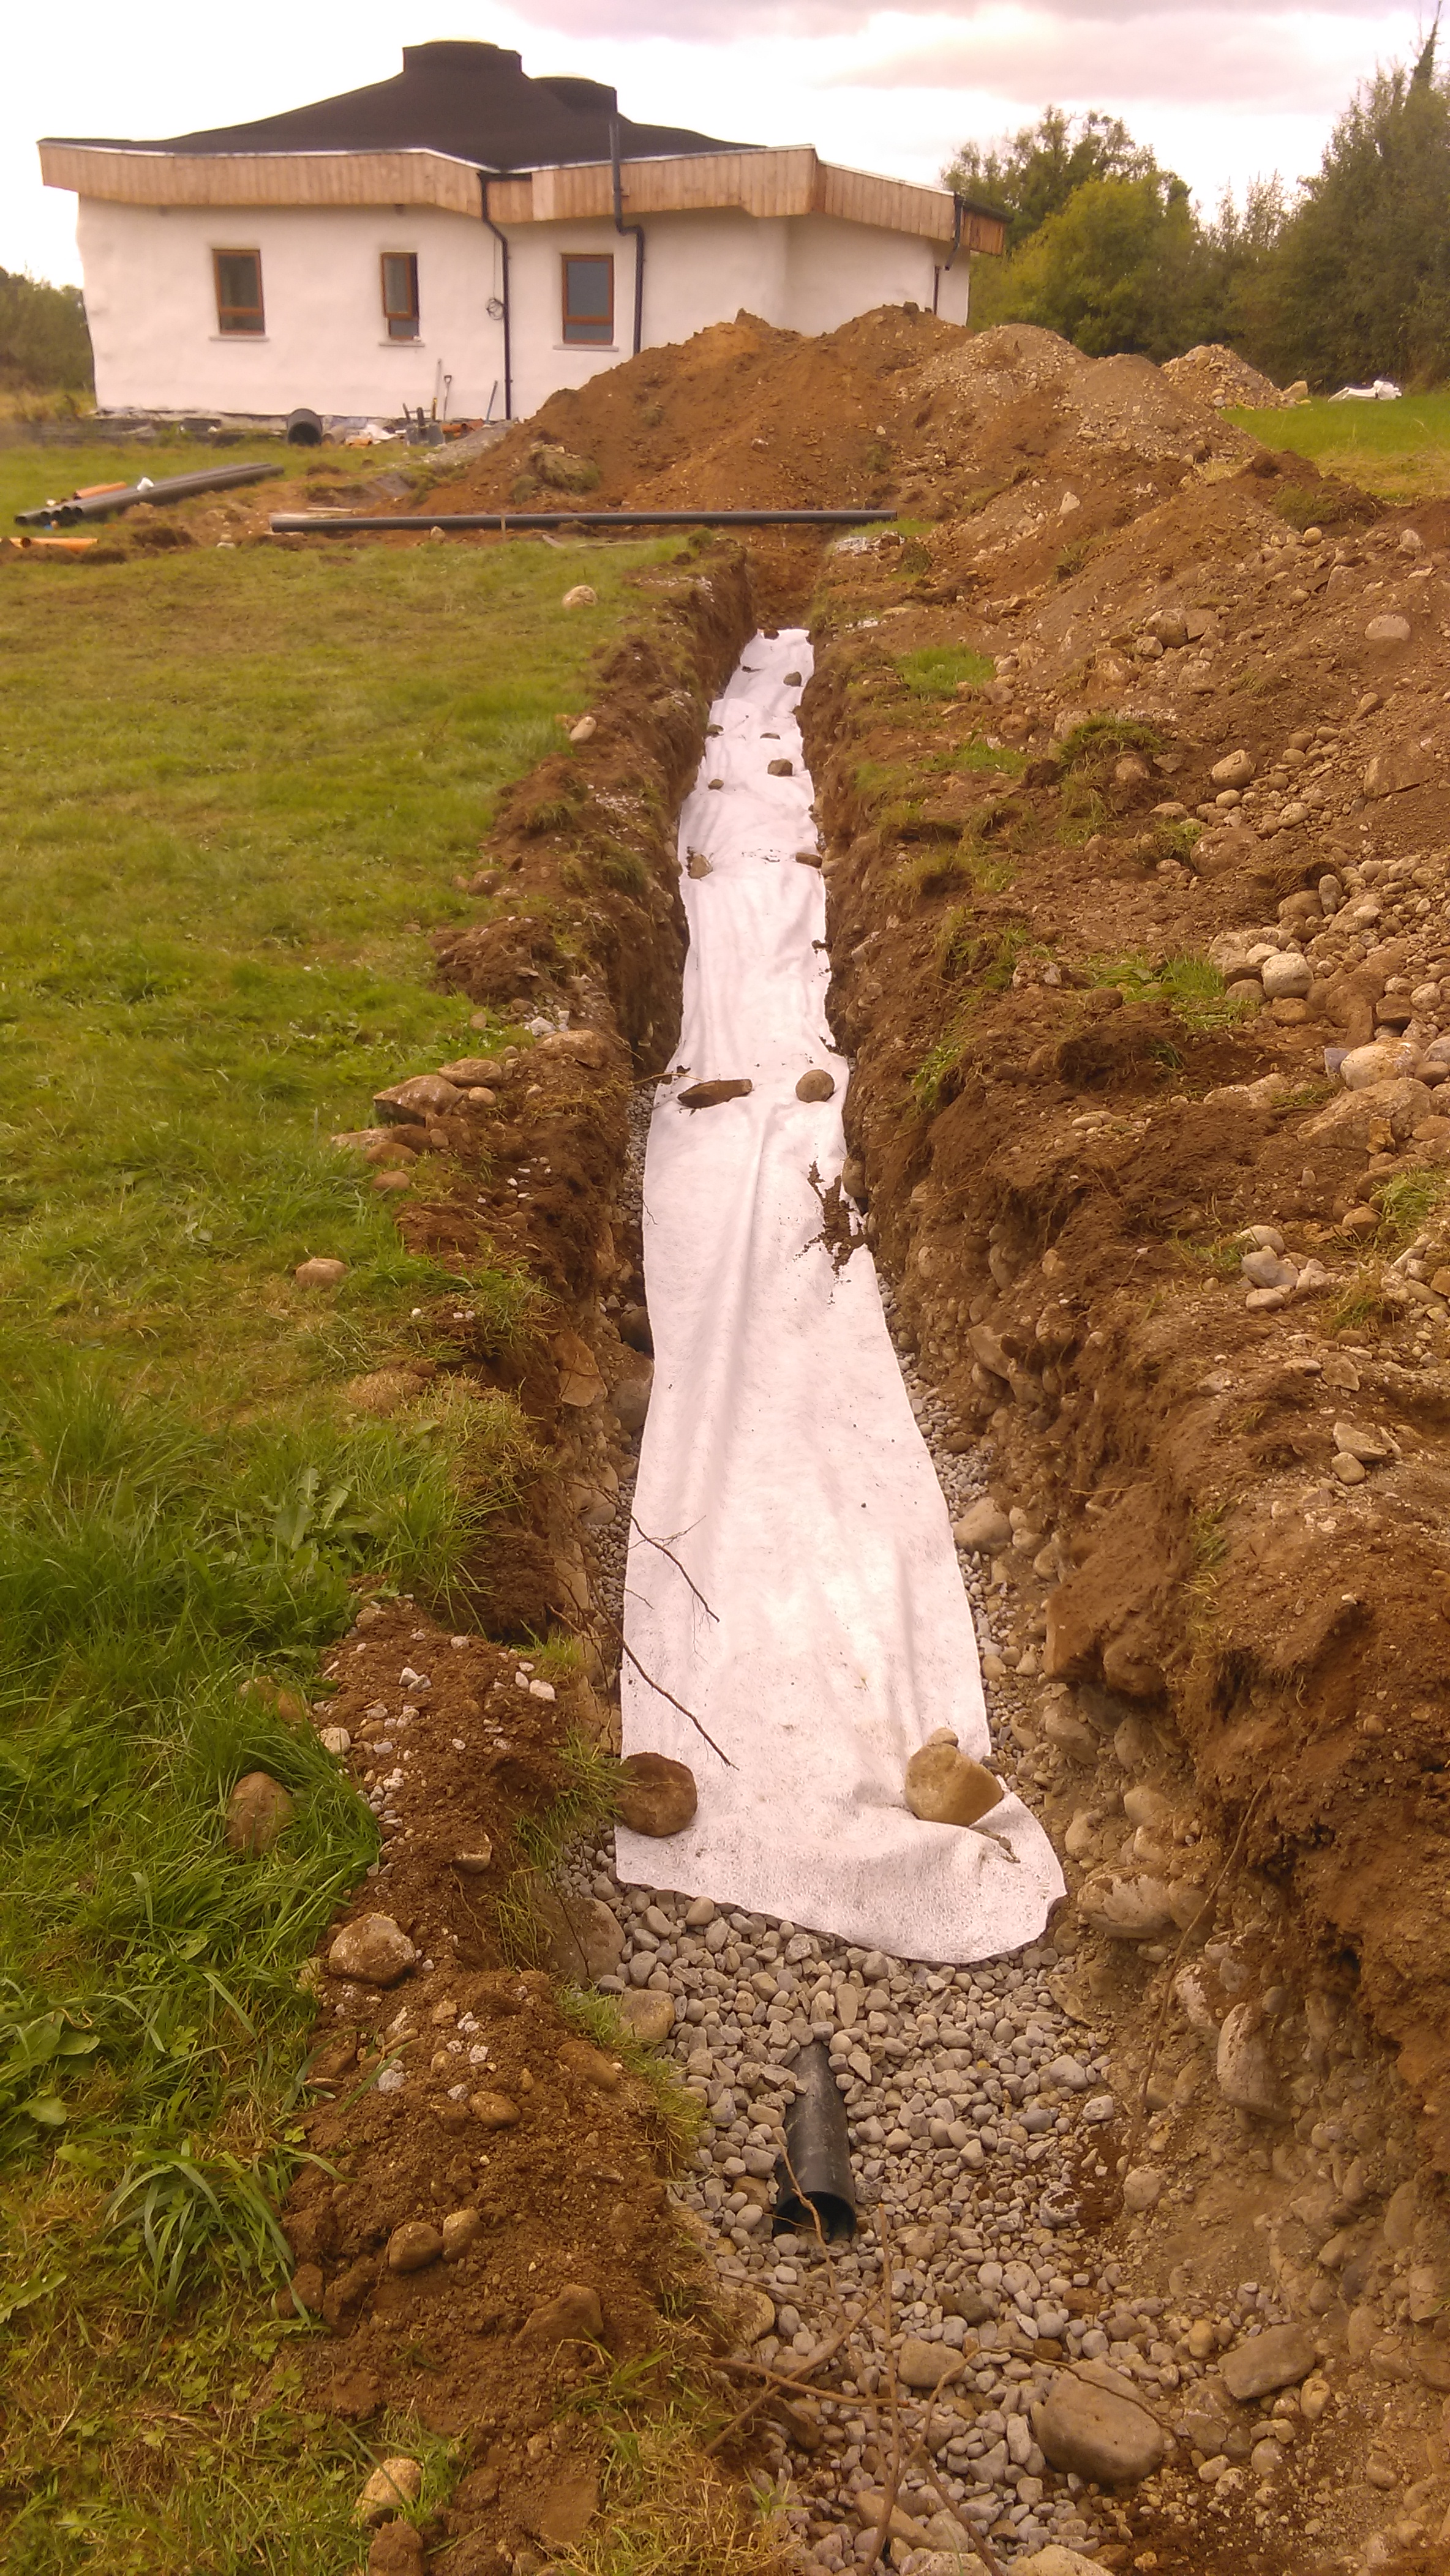
Unfortunately the weather got quite wet towards the end of this job and most of our back garden was quite ground up. The percolation area was approximately 18m x 12.5m and so takes up quite a bit of space on the site. The photo left below shows the distribution box where water from the septic tank flows before entering the six 18m percolation pipes where the water – which has been cleaned by the anaerobic processes in the tank – percolates into the soil. The photo on the right shows one of the trenches, where the percolation pipe is surrounded by granular material and covered by Terram (a weed barrier to prevent roots affecting the pipes). The end of this pipe will be joined to the ends of the other 5 and will be vented to avoid a build up of gases.

The design of the septic tank was based on the percolation test we were required to have before applying for planning permission. A local company, Molloy Precast, supply septic tanks and piping for the percolation system based on the information from the percolation test. Luckily our site is in an area which has very good drainage and no part of the site has ever been subject to flooding.


Thanks to everyone who has taken the time to read this blog.
The next phase of work on our house will mainly be concerned with getting the garden into shape, but that is for Spring time.
For now we’re just enjoying being at home.
Best wishes to all for the New Year.


Congratulations Guys! You must both be so proud to see the results of all your labours. What a way to start the New Year. It looks fabulous and you must have a real sense of achievement. Next time we get over to Ireland we’ll be sure to look by and admire!
LikeLiked by 1 person
Wonderful to hear cheers Niamh ( Jo’s friend )
LikeLiked by 1 person
What an amazing achievement. You should both feel extremely proud. Hopefully, you’re now over the exhaustion of it all and can really kick back and enjoy the fruits of your labour. I hope you have many, many years of happiness, love and laughter in your very own hand made home. Sending love to you both. B xx
LikeLiked by 1 person